There’s nothing like watching Isabella have so much fun painting, and being so proud of the final results! This year for Valentine’s Day I decided we’d up our game a bit and instead of making cards, we would make something that could be used and enjoyed all year long, magnets!
Here’s what you’ll need:
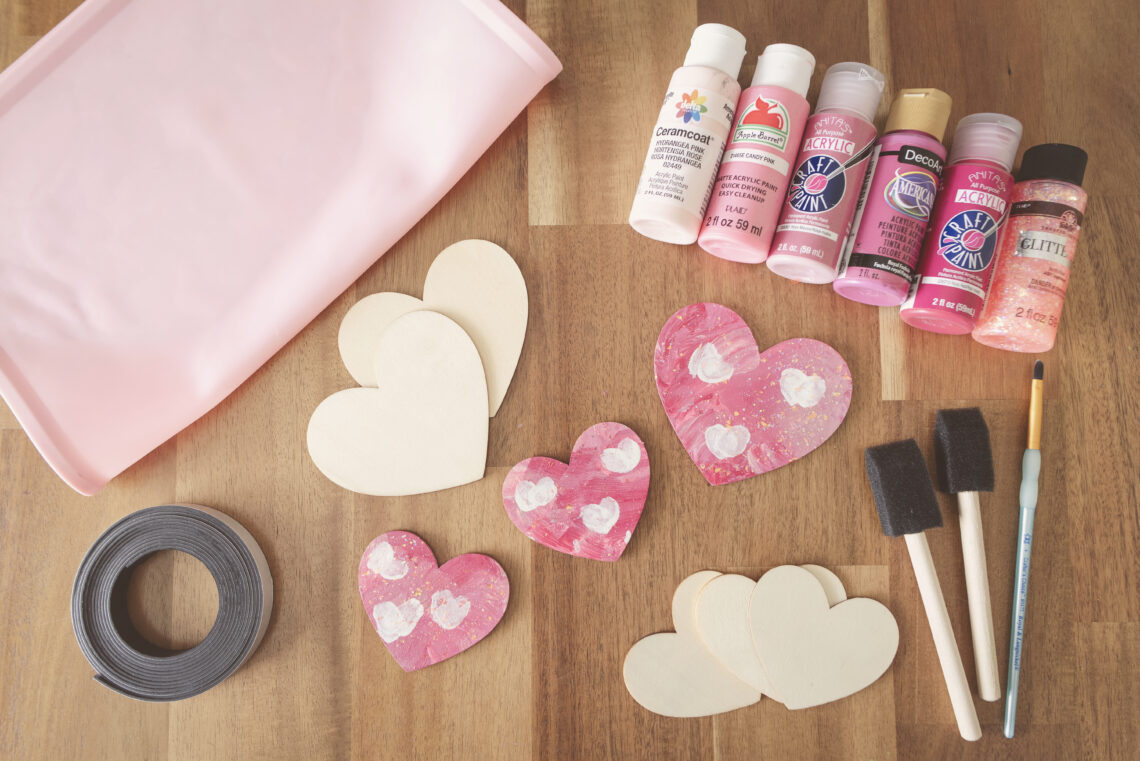
- Wooden hearts
- Adhesive Magnet
- Paint
- Glitter paint
- Paint foam brushes
- Paint brush
- Scissors
- Paint palette or something to put paint on
- Something to protect table (placemat or other)
All of our supplies were purchased from our local Hobby Lobby, but i’m sure you could find them or something similar at any craft store. 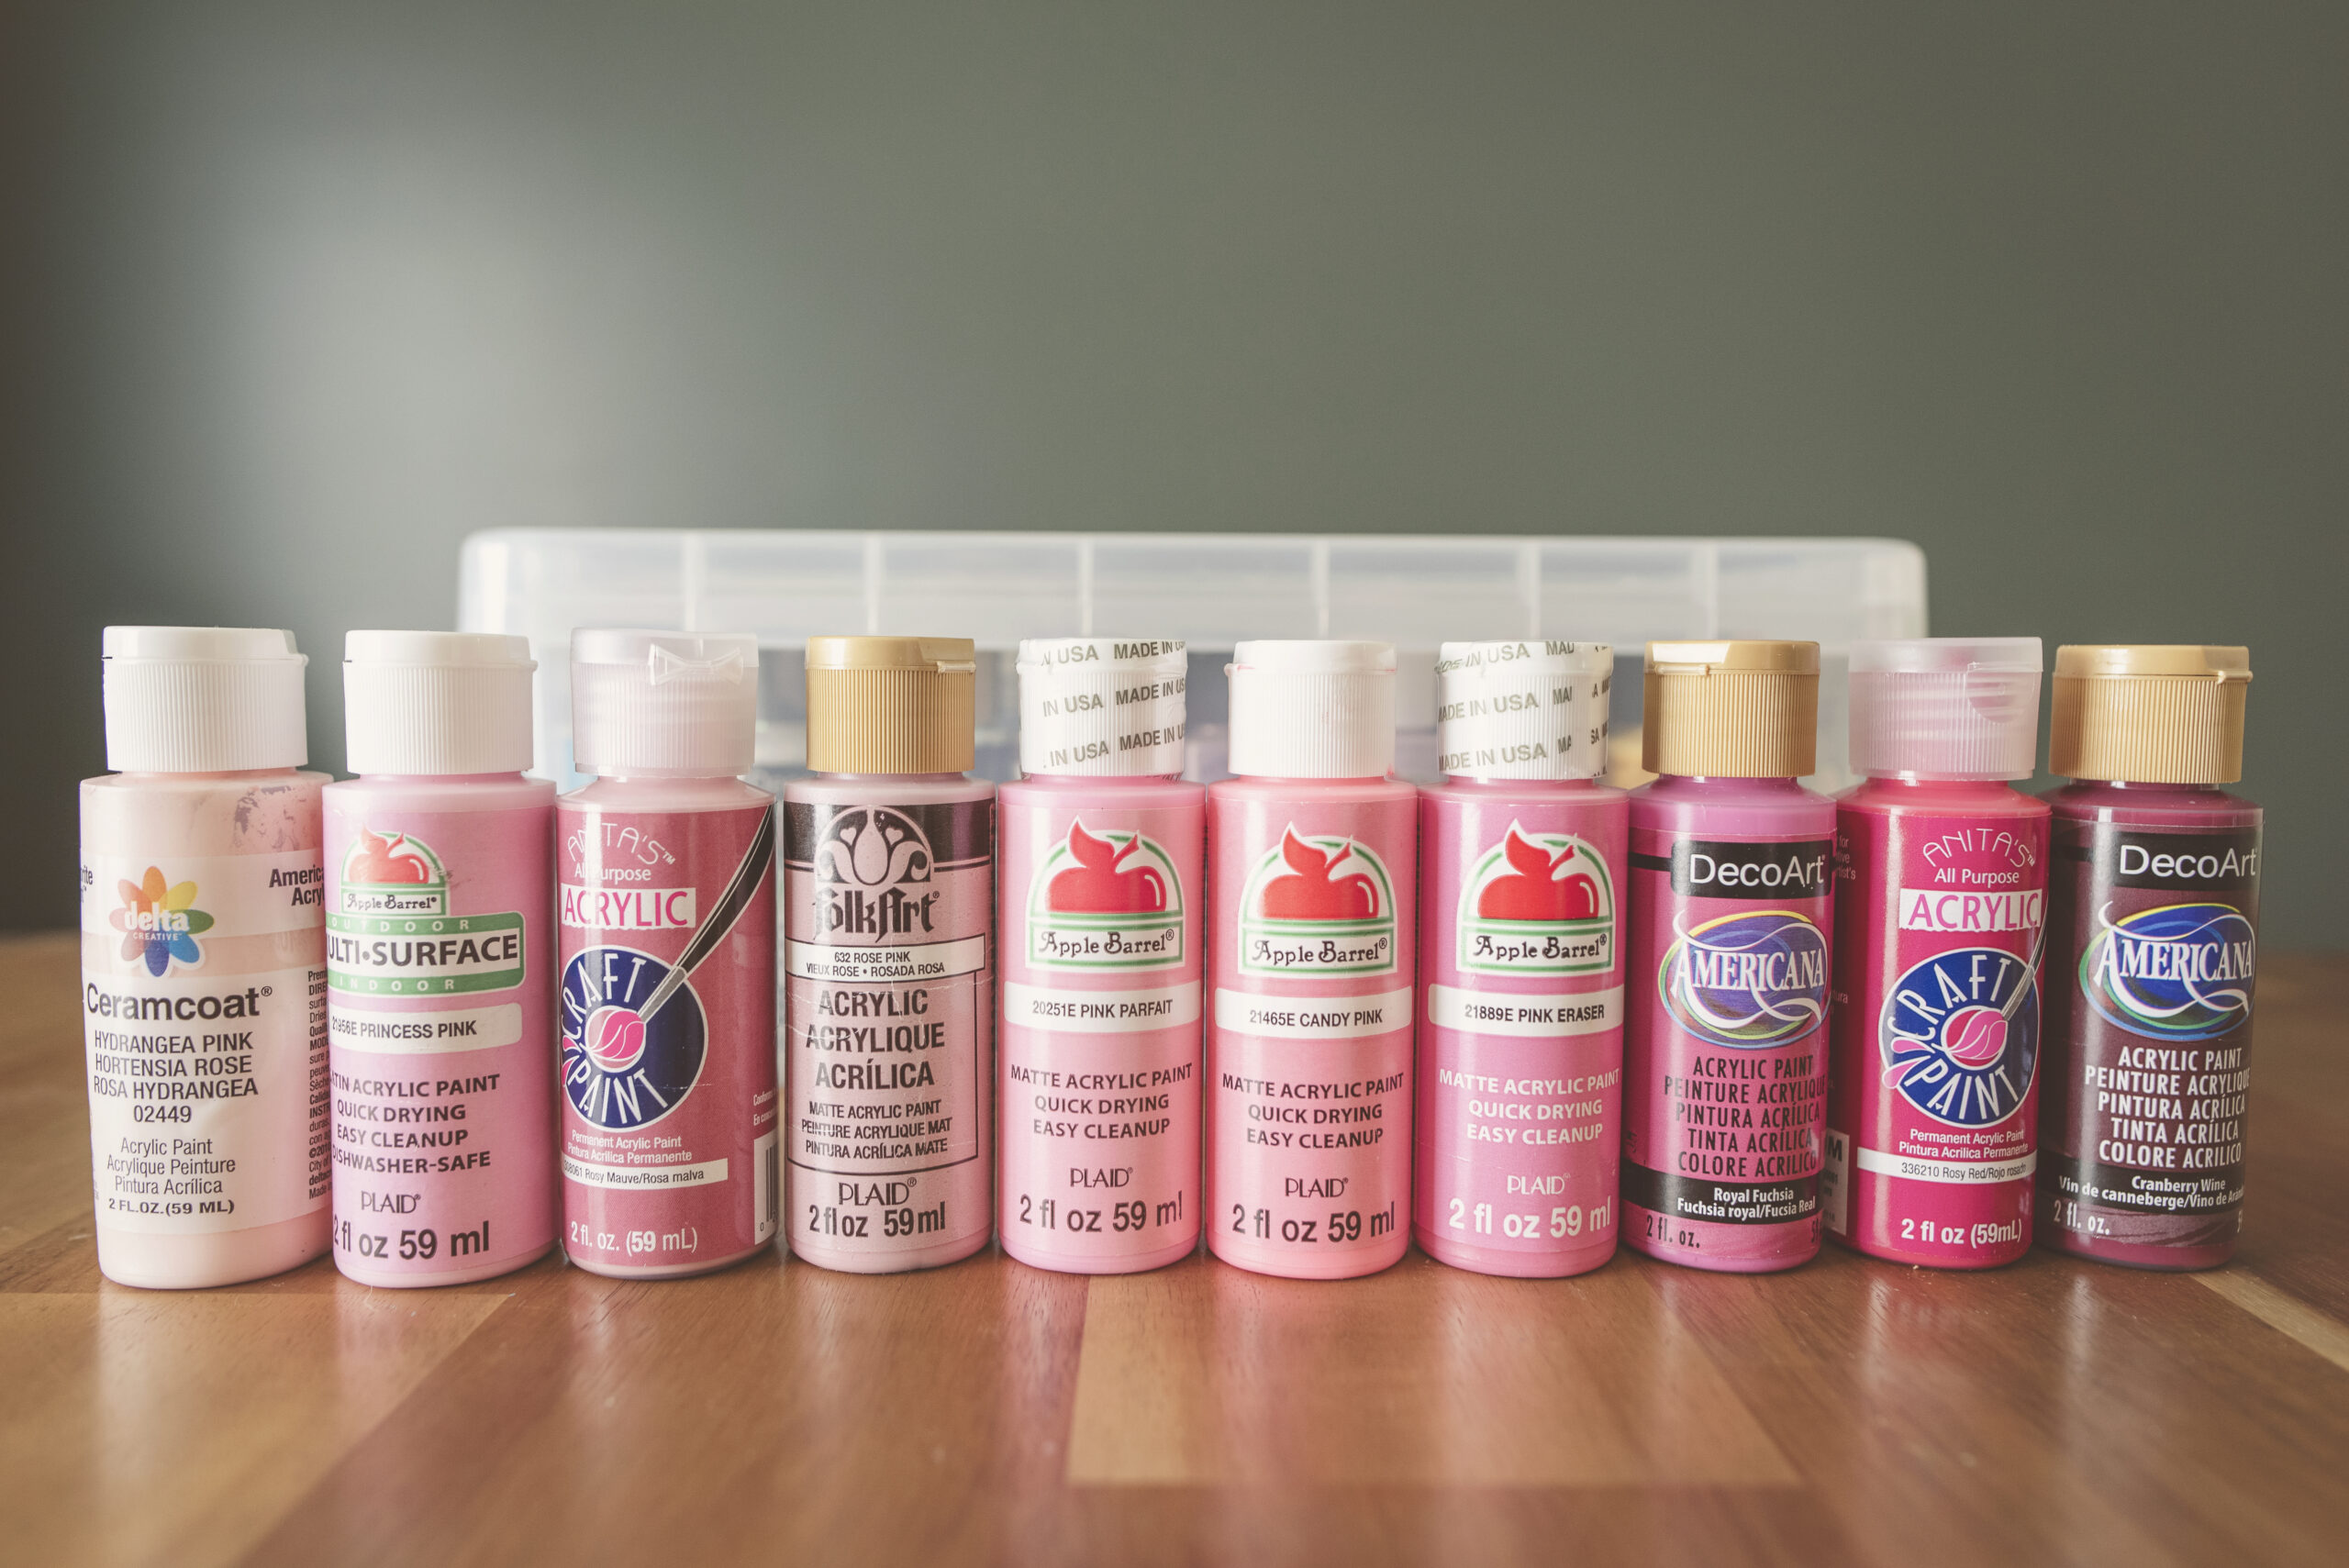
The first thing we did was decide on colors. I knew I wanted these to have a monochromatic scheme of pinks so I brought out all the paints we already had in those colors and the new ones we had purchased and let Isabella choose 5 of them. After all, I always try to let her make decisions and choices about the crafts she does, so they feel genuinely hers.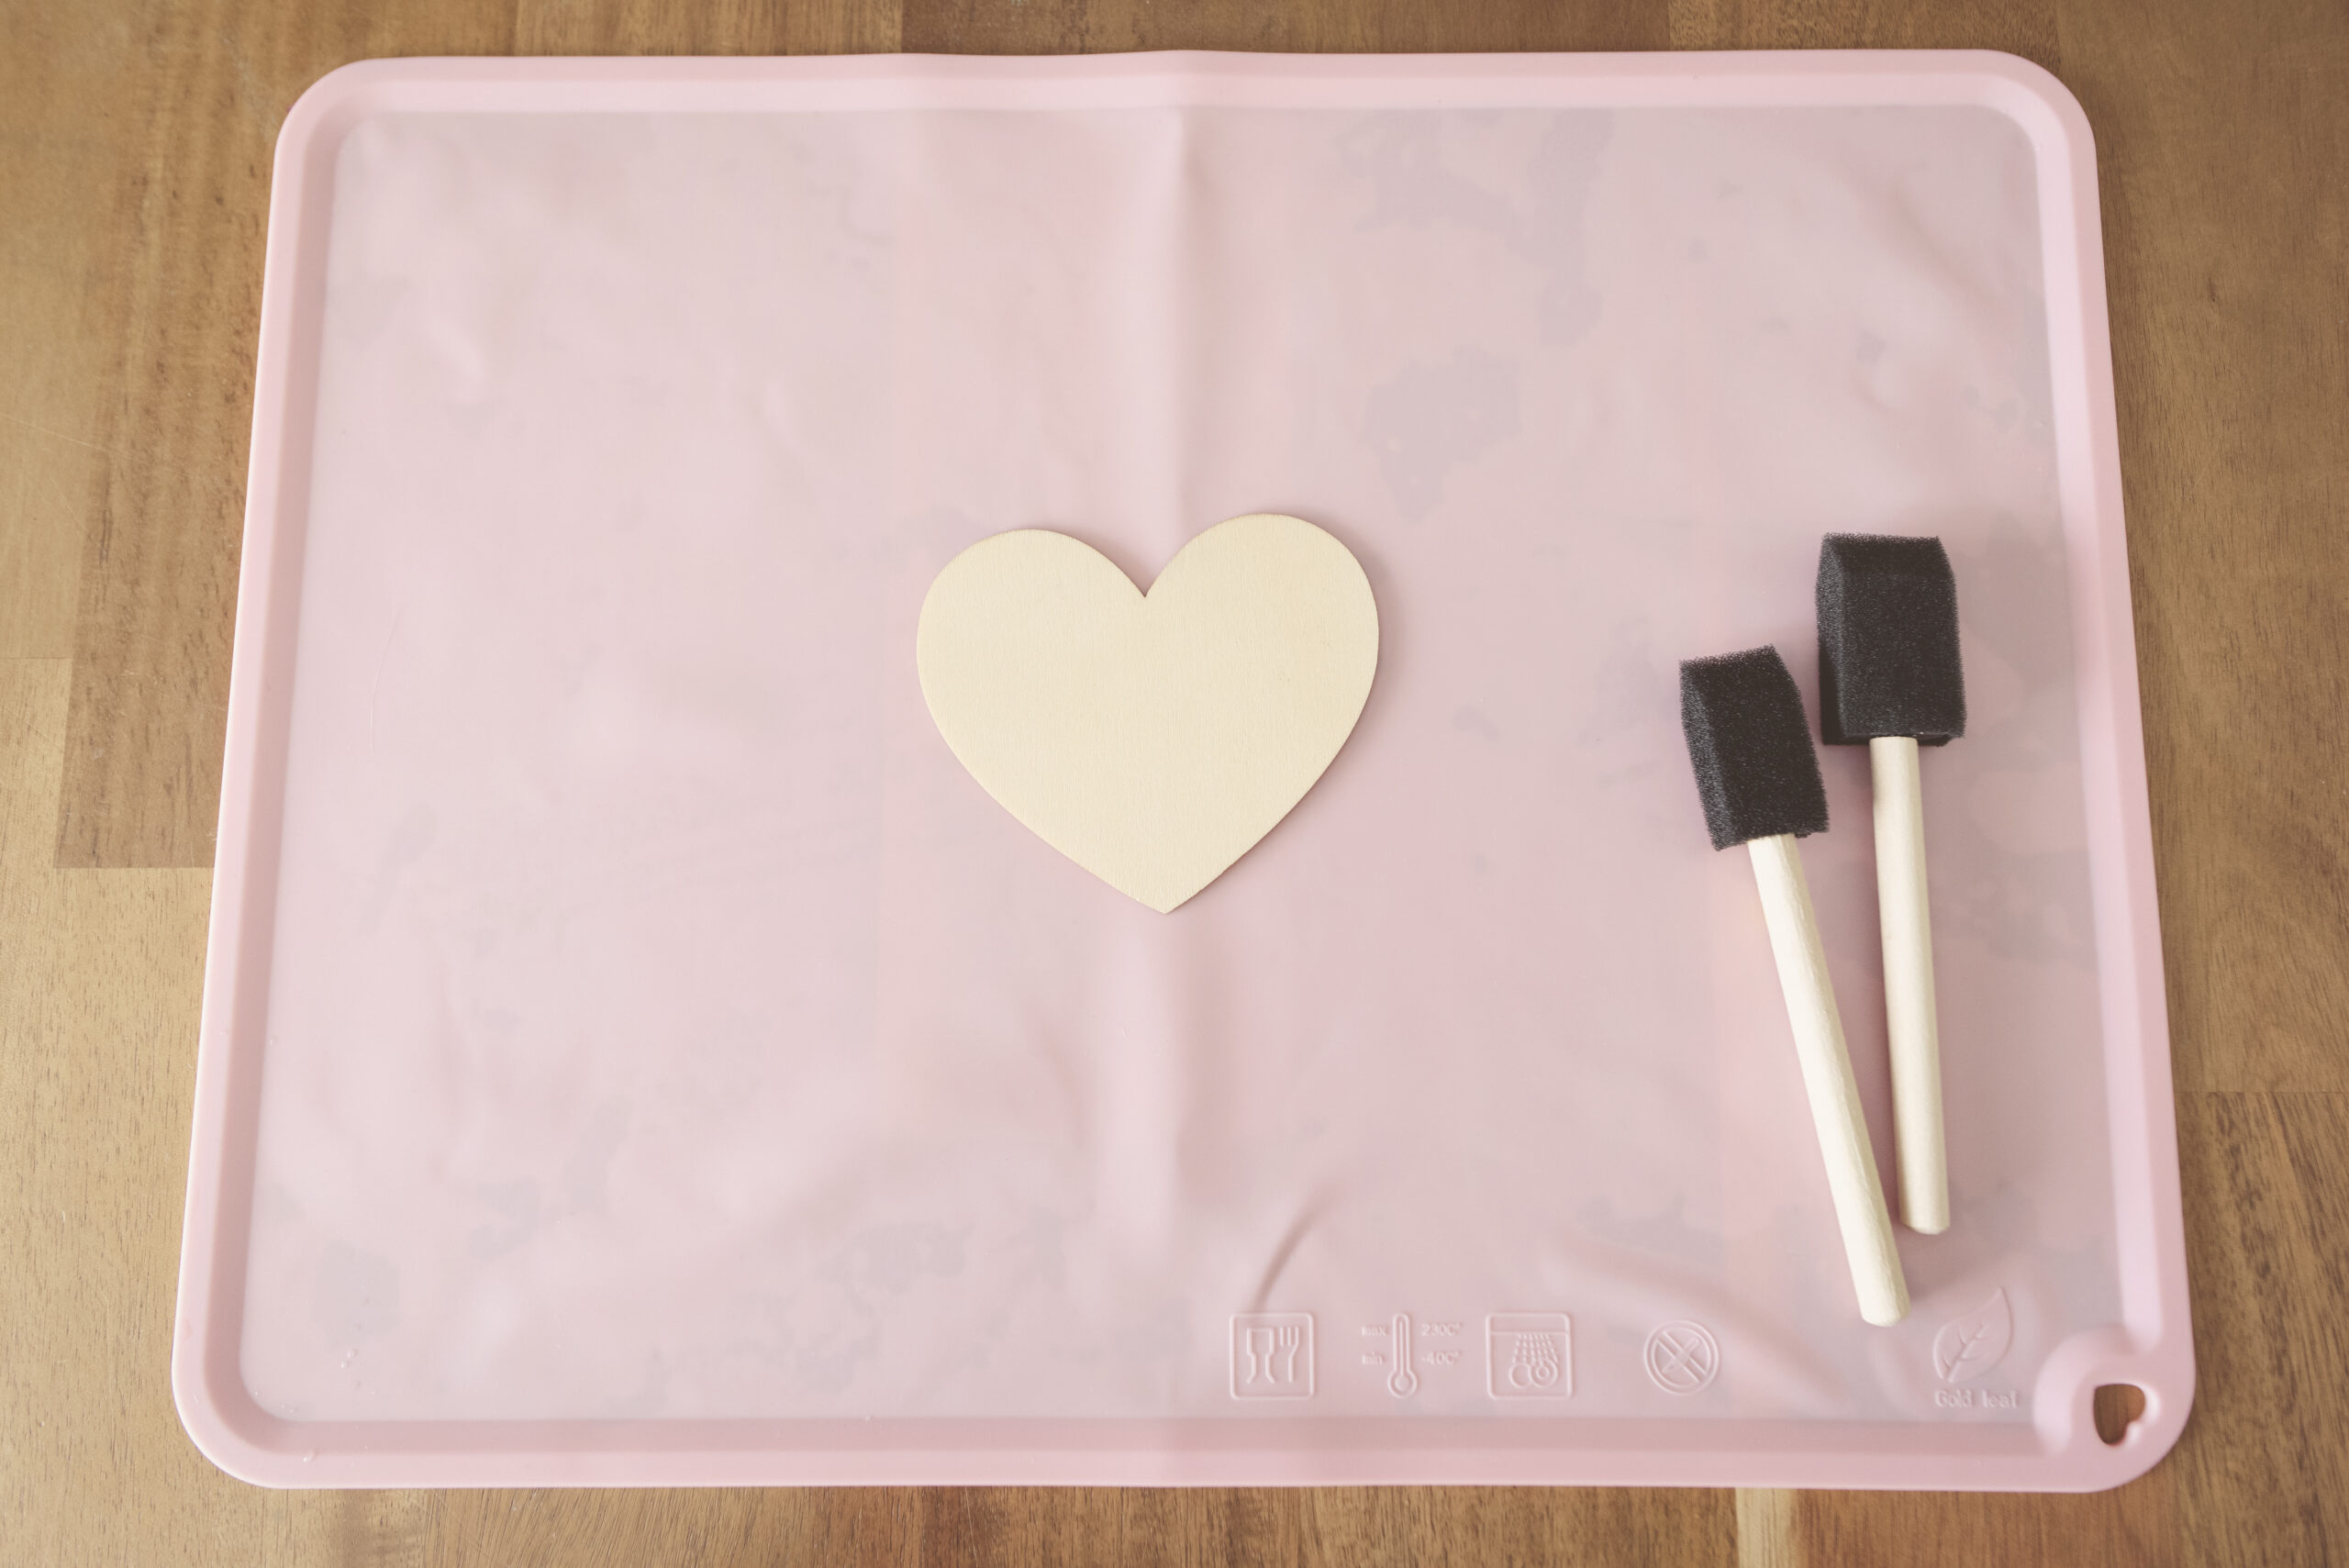
After she had picked her colors, I laid down a placemat for her to work on. This is optional. In the past I have let her paint things on paper plates, white computer paper or on large pieces of cardboard. Really anything to protect your table will work! 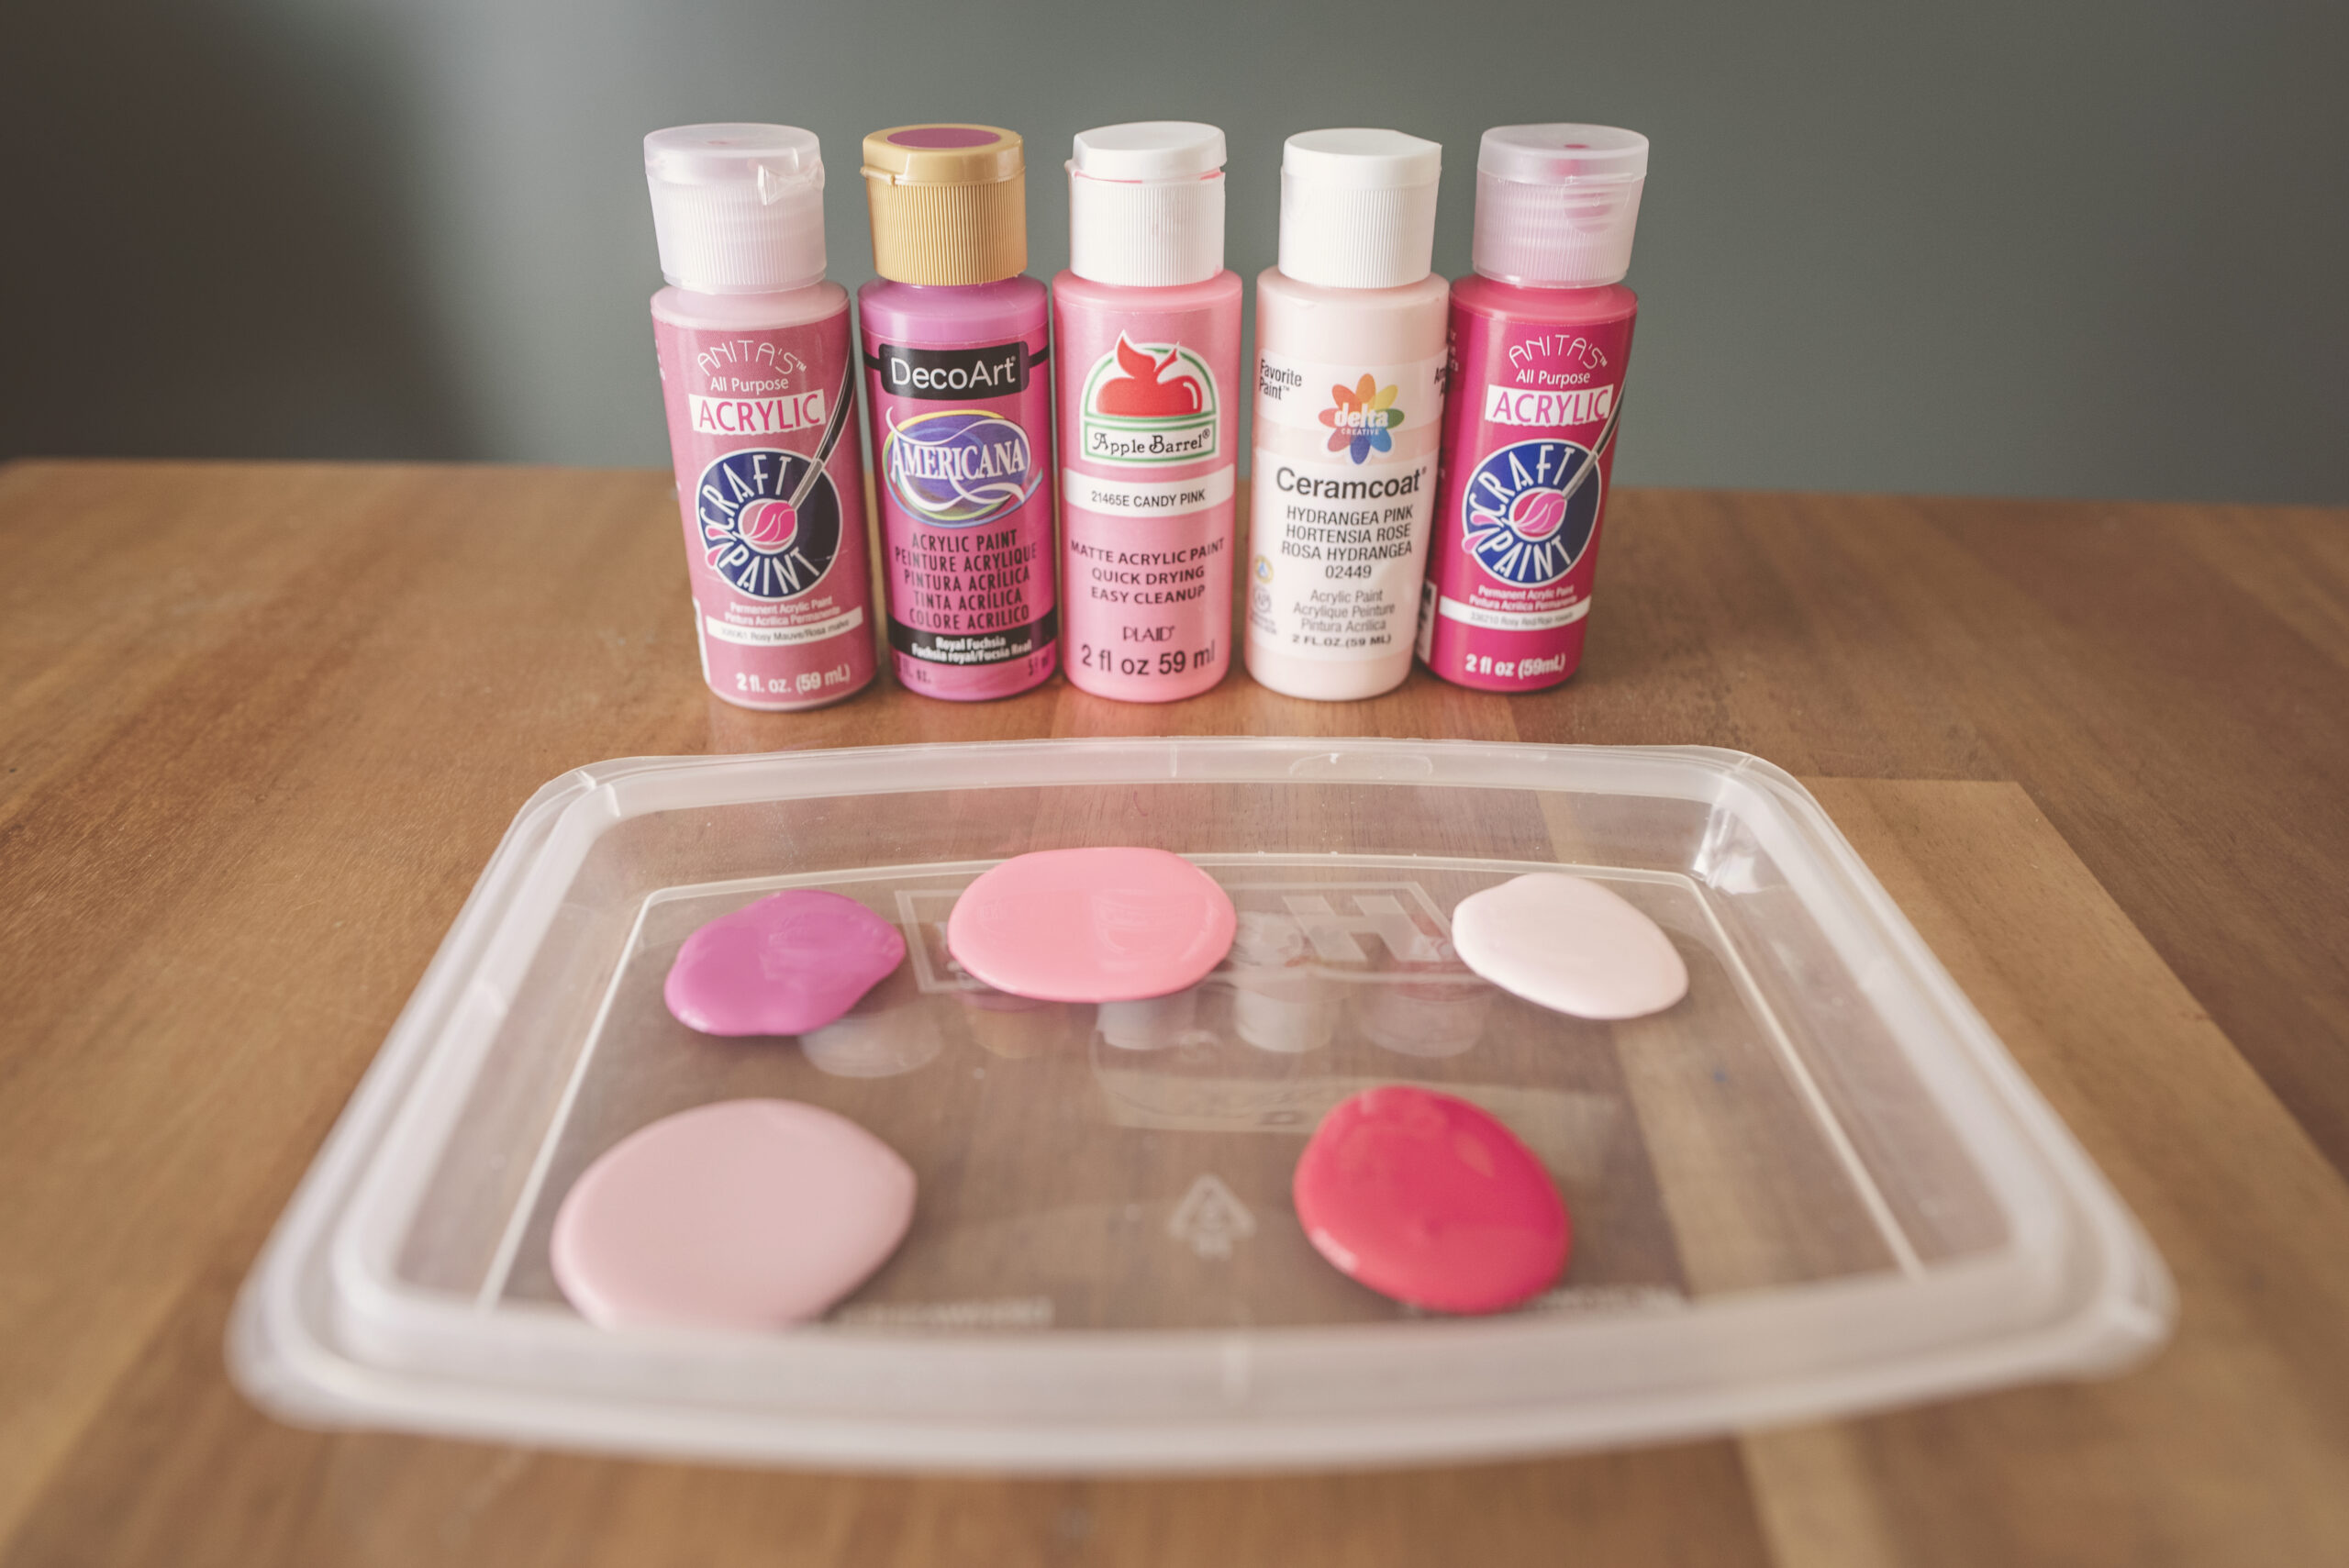
Next I squirted a little of each chosen paint onto a plastic reusable container lid, as our plastic paint palettes were missing in action (MIA) somehow at the time of this project. By the time the paints were in place, Isabella was excited and ready! With her hair pulled up, an oversize crafting shirt on in case she got messy or had any splatter, she was ready to start!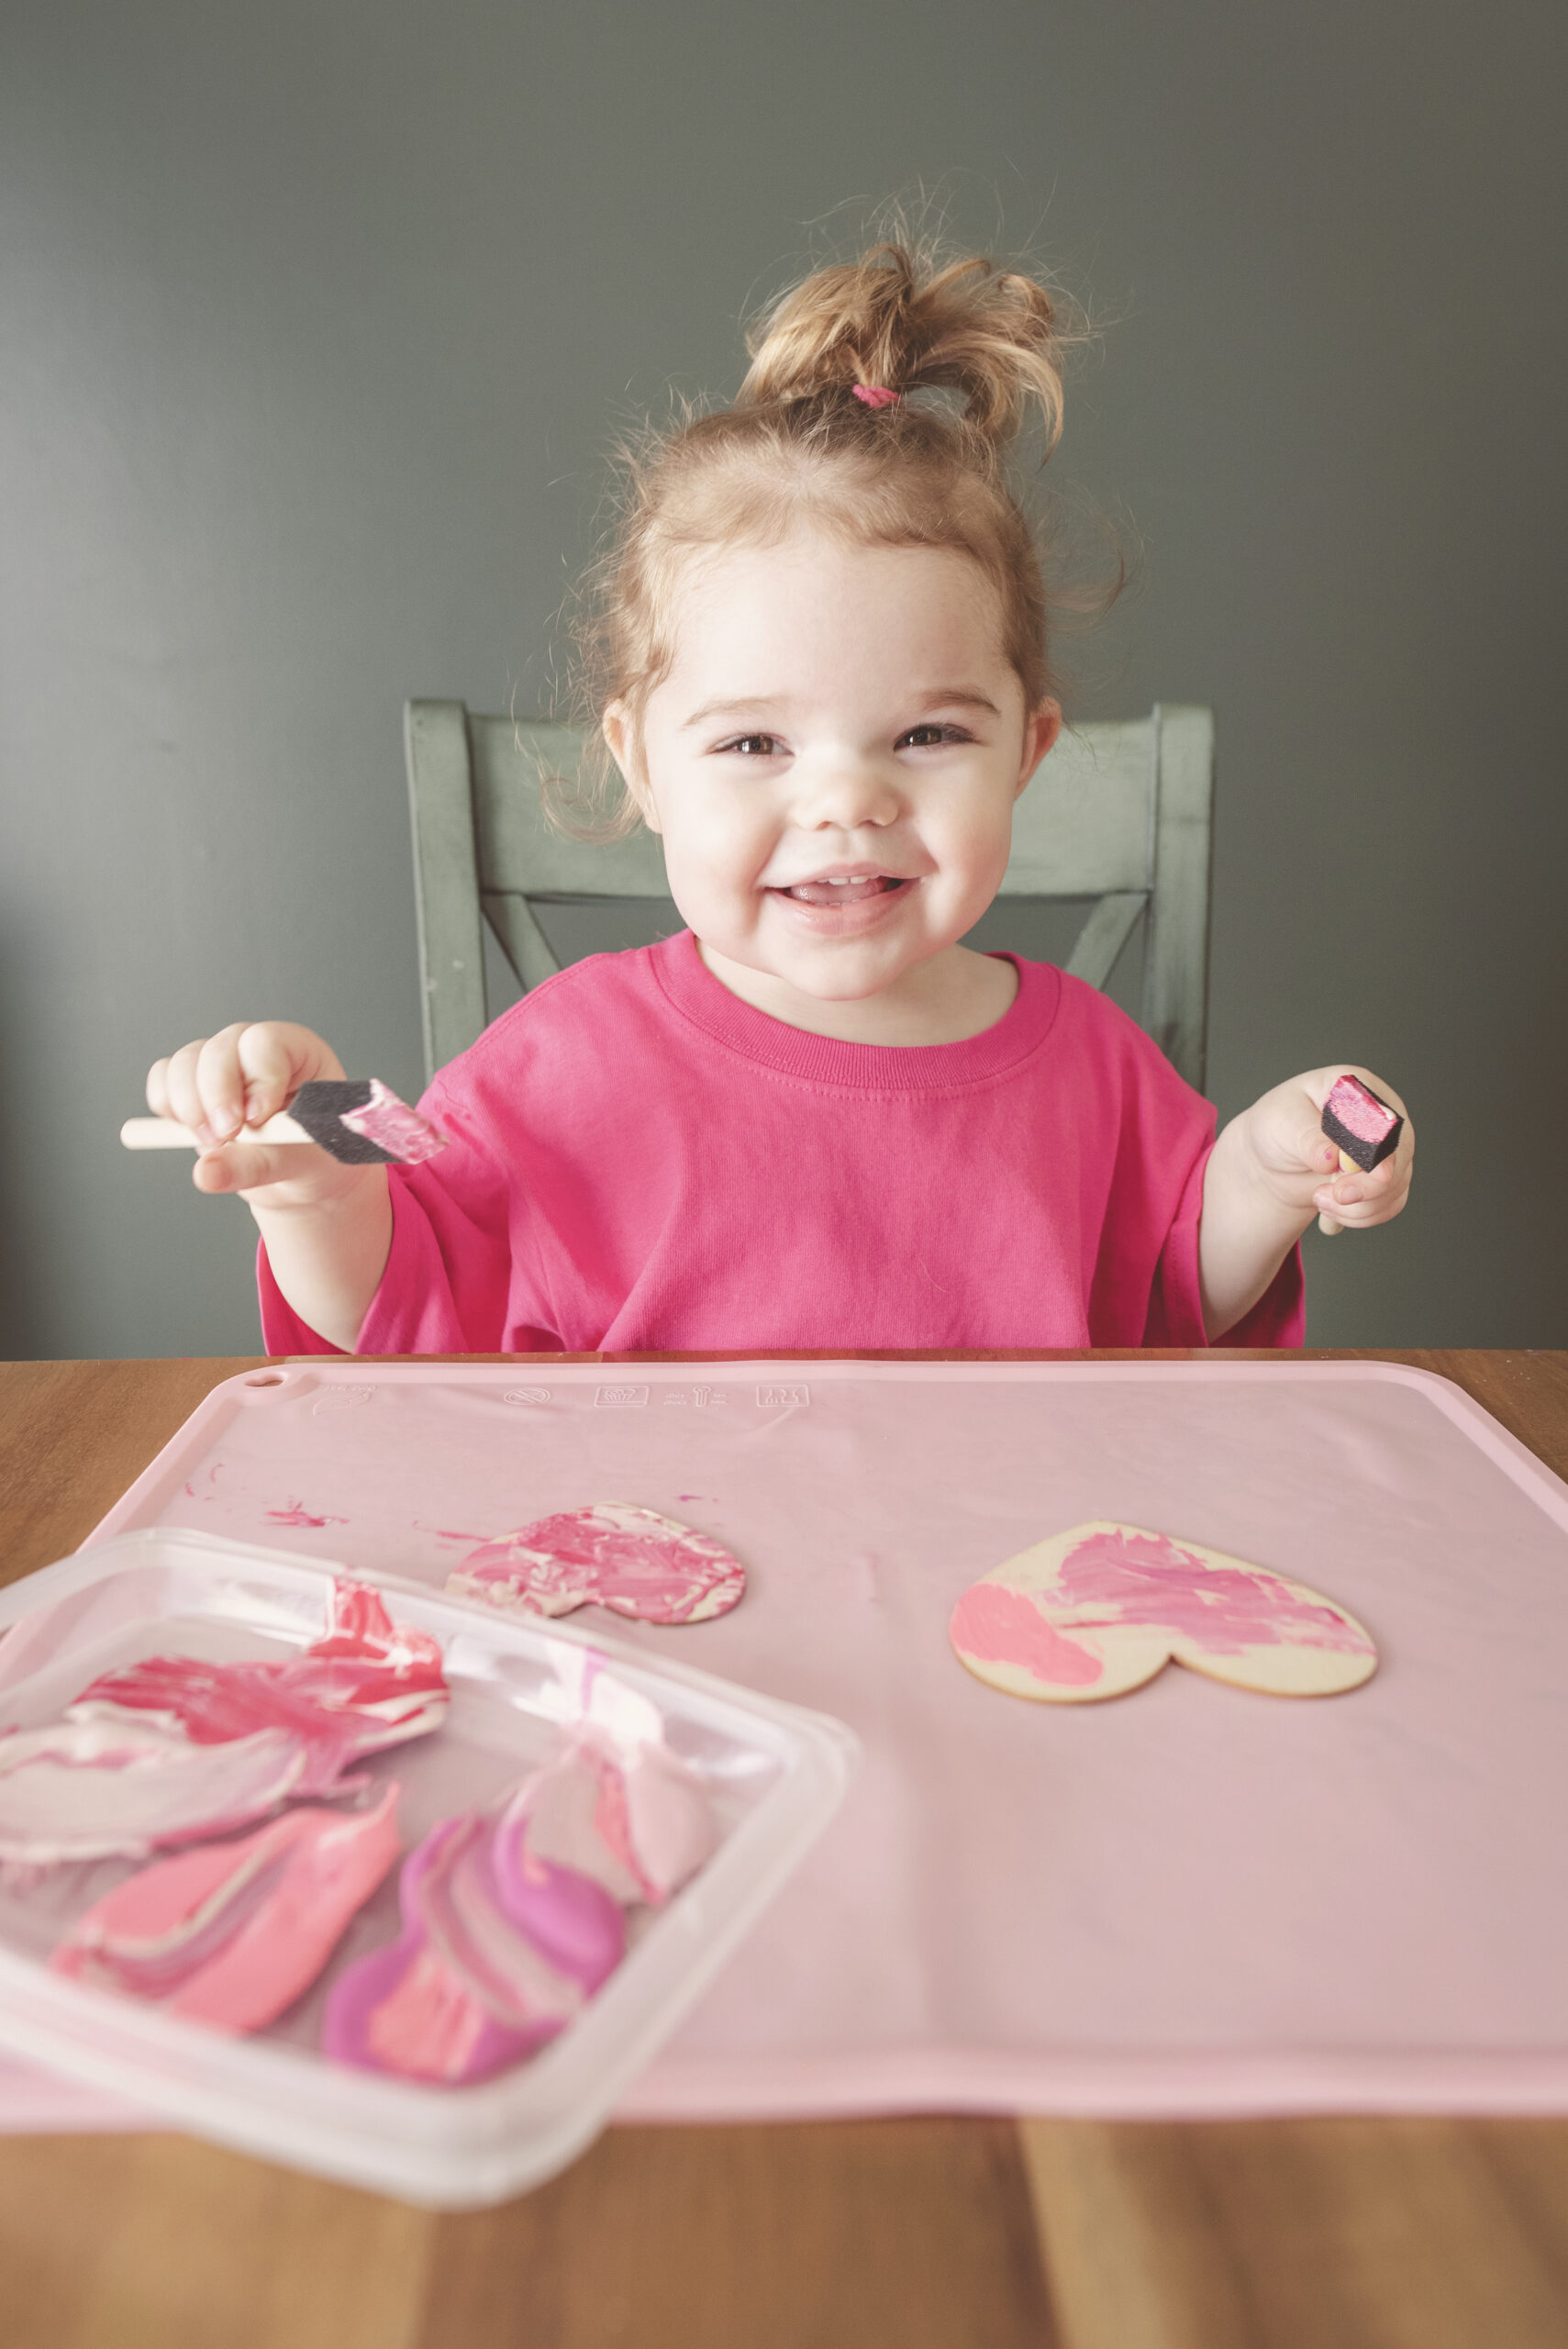
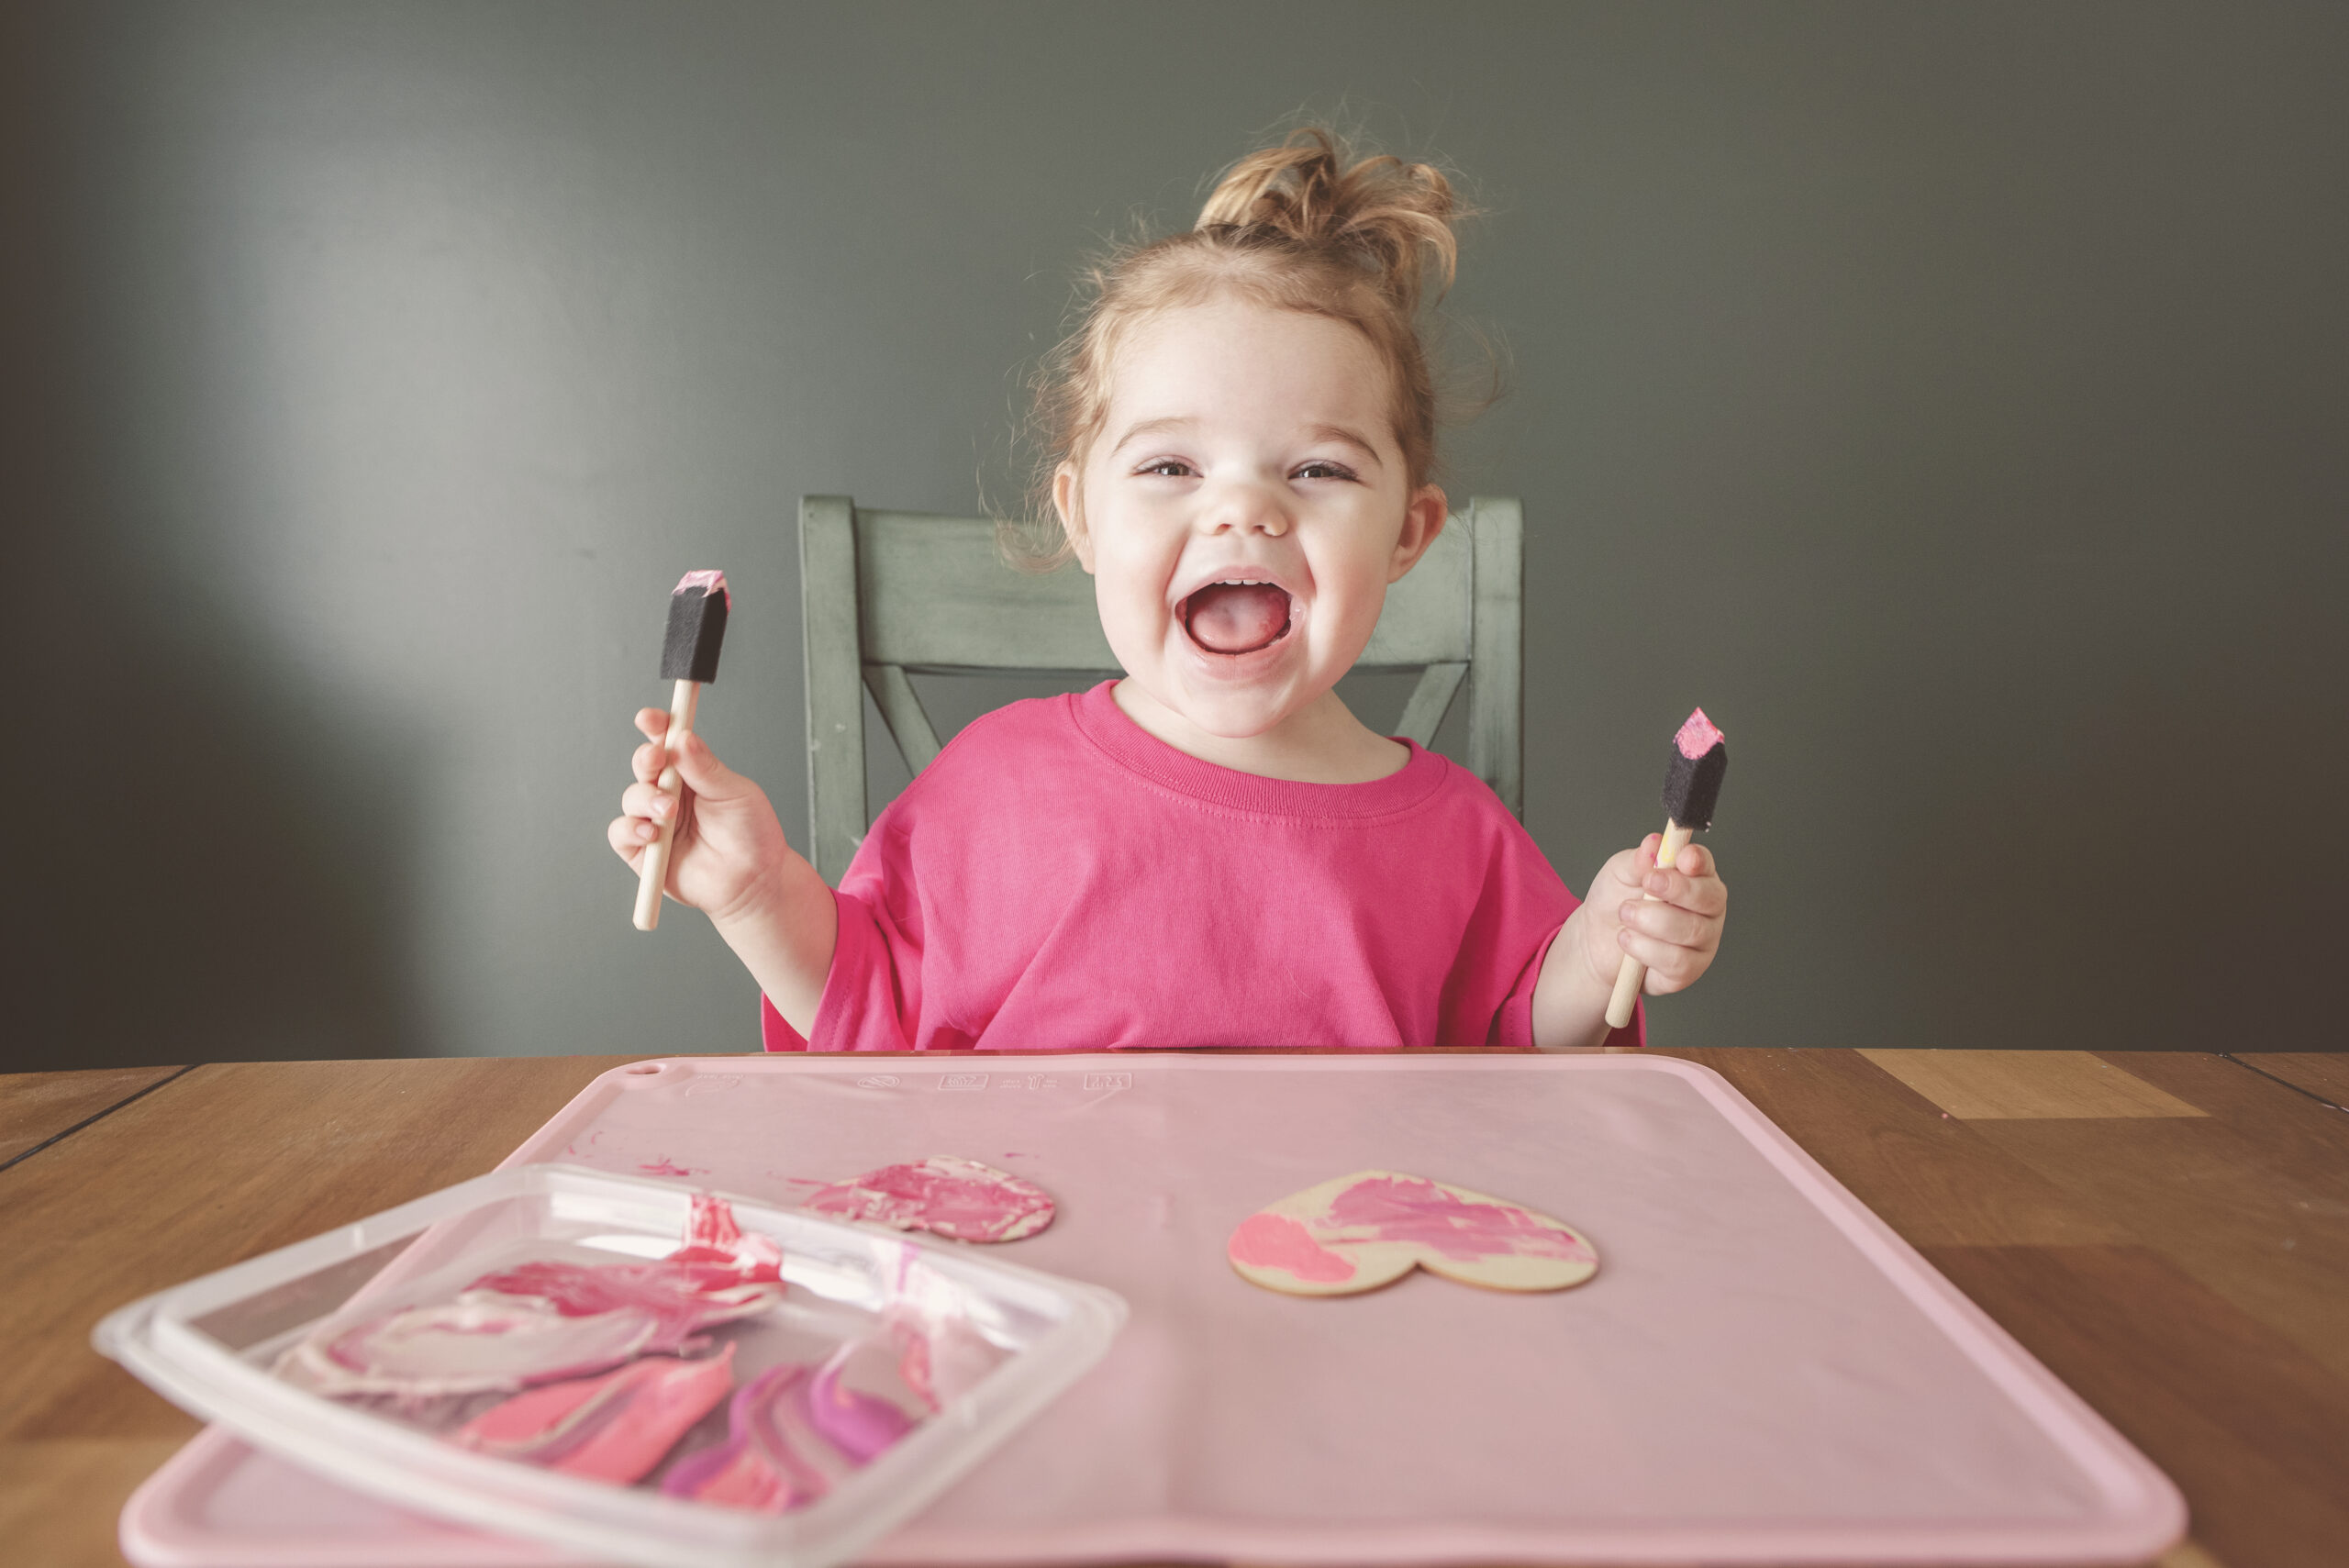
As she would finish a heart, I would ask if she wanted to do another and give her a fresh one while I set the other on the counter to dry.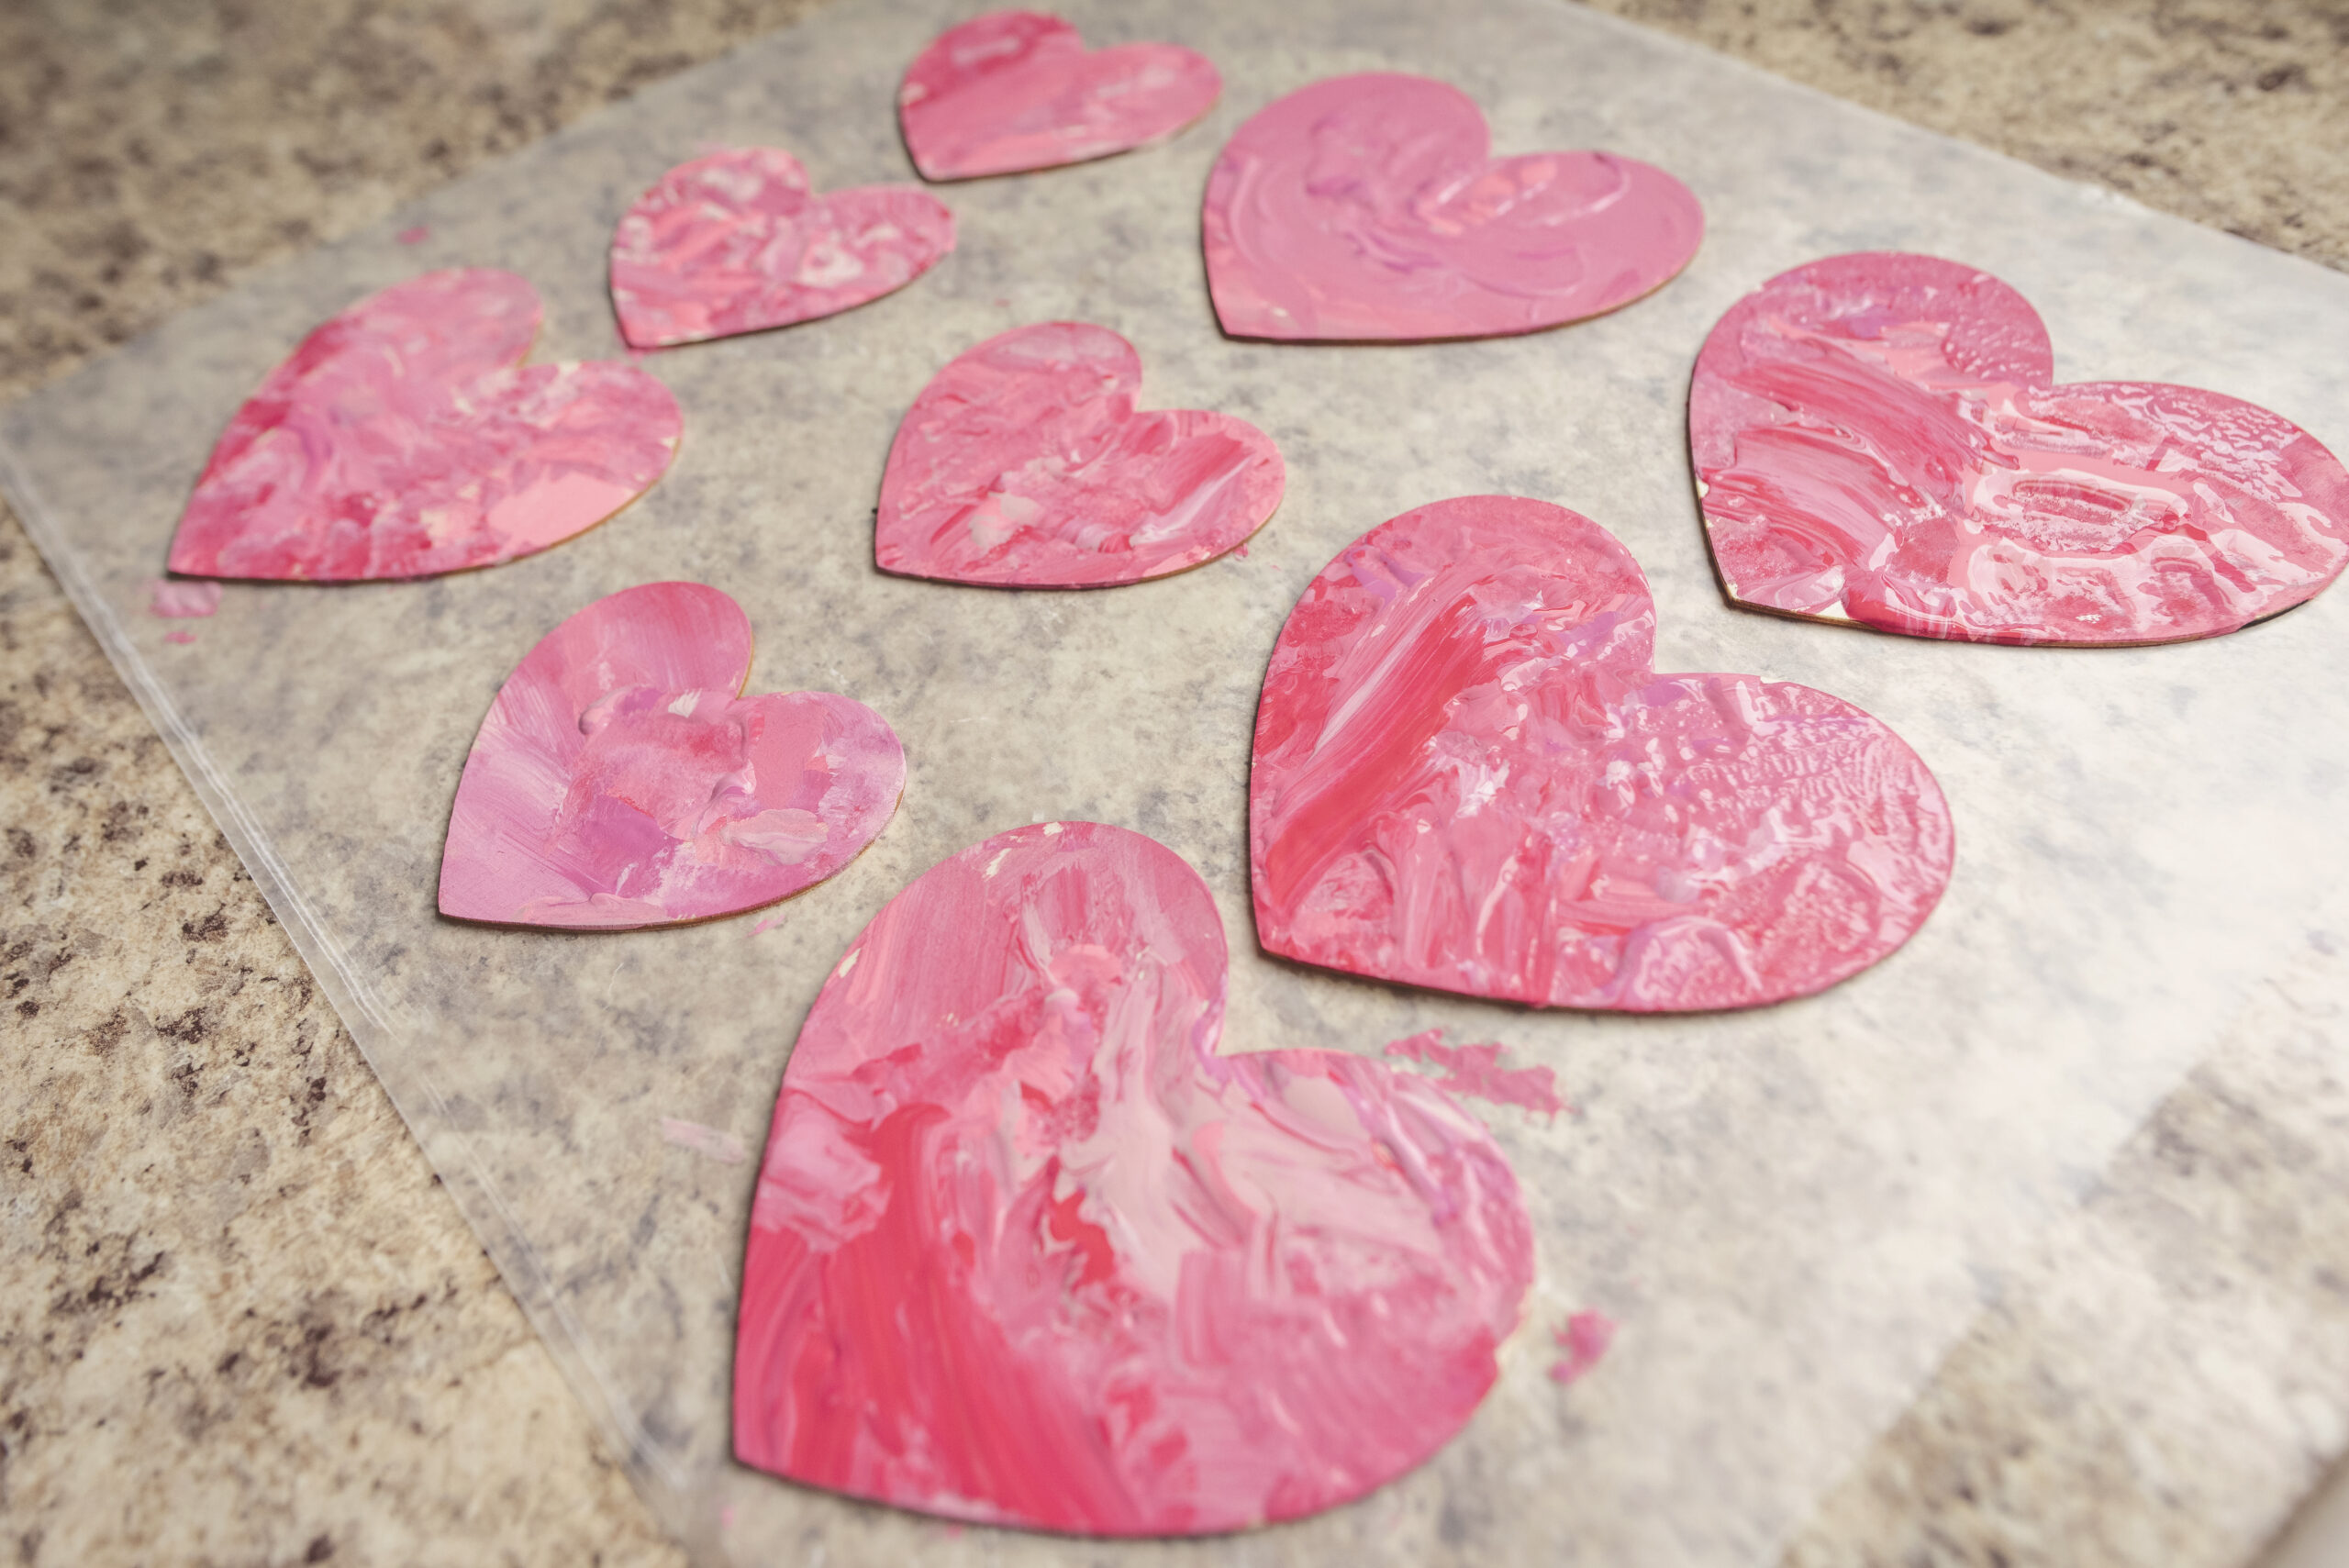
Depending on how many you are having your child do, you may need to take a break at some point or plan to do half one day and half the next! I’ve found either of these options will keep them excited about the project and engaged in wanting to do it!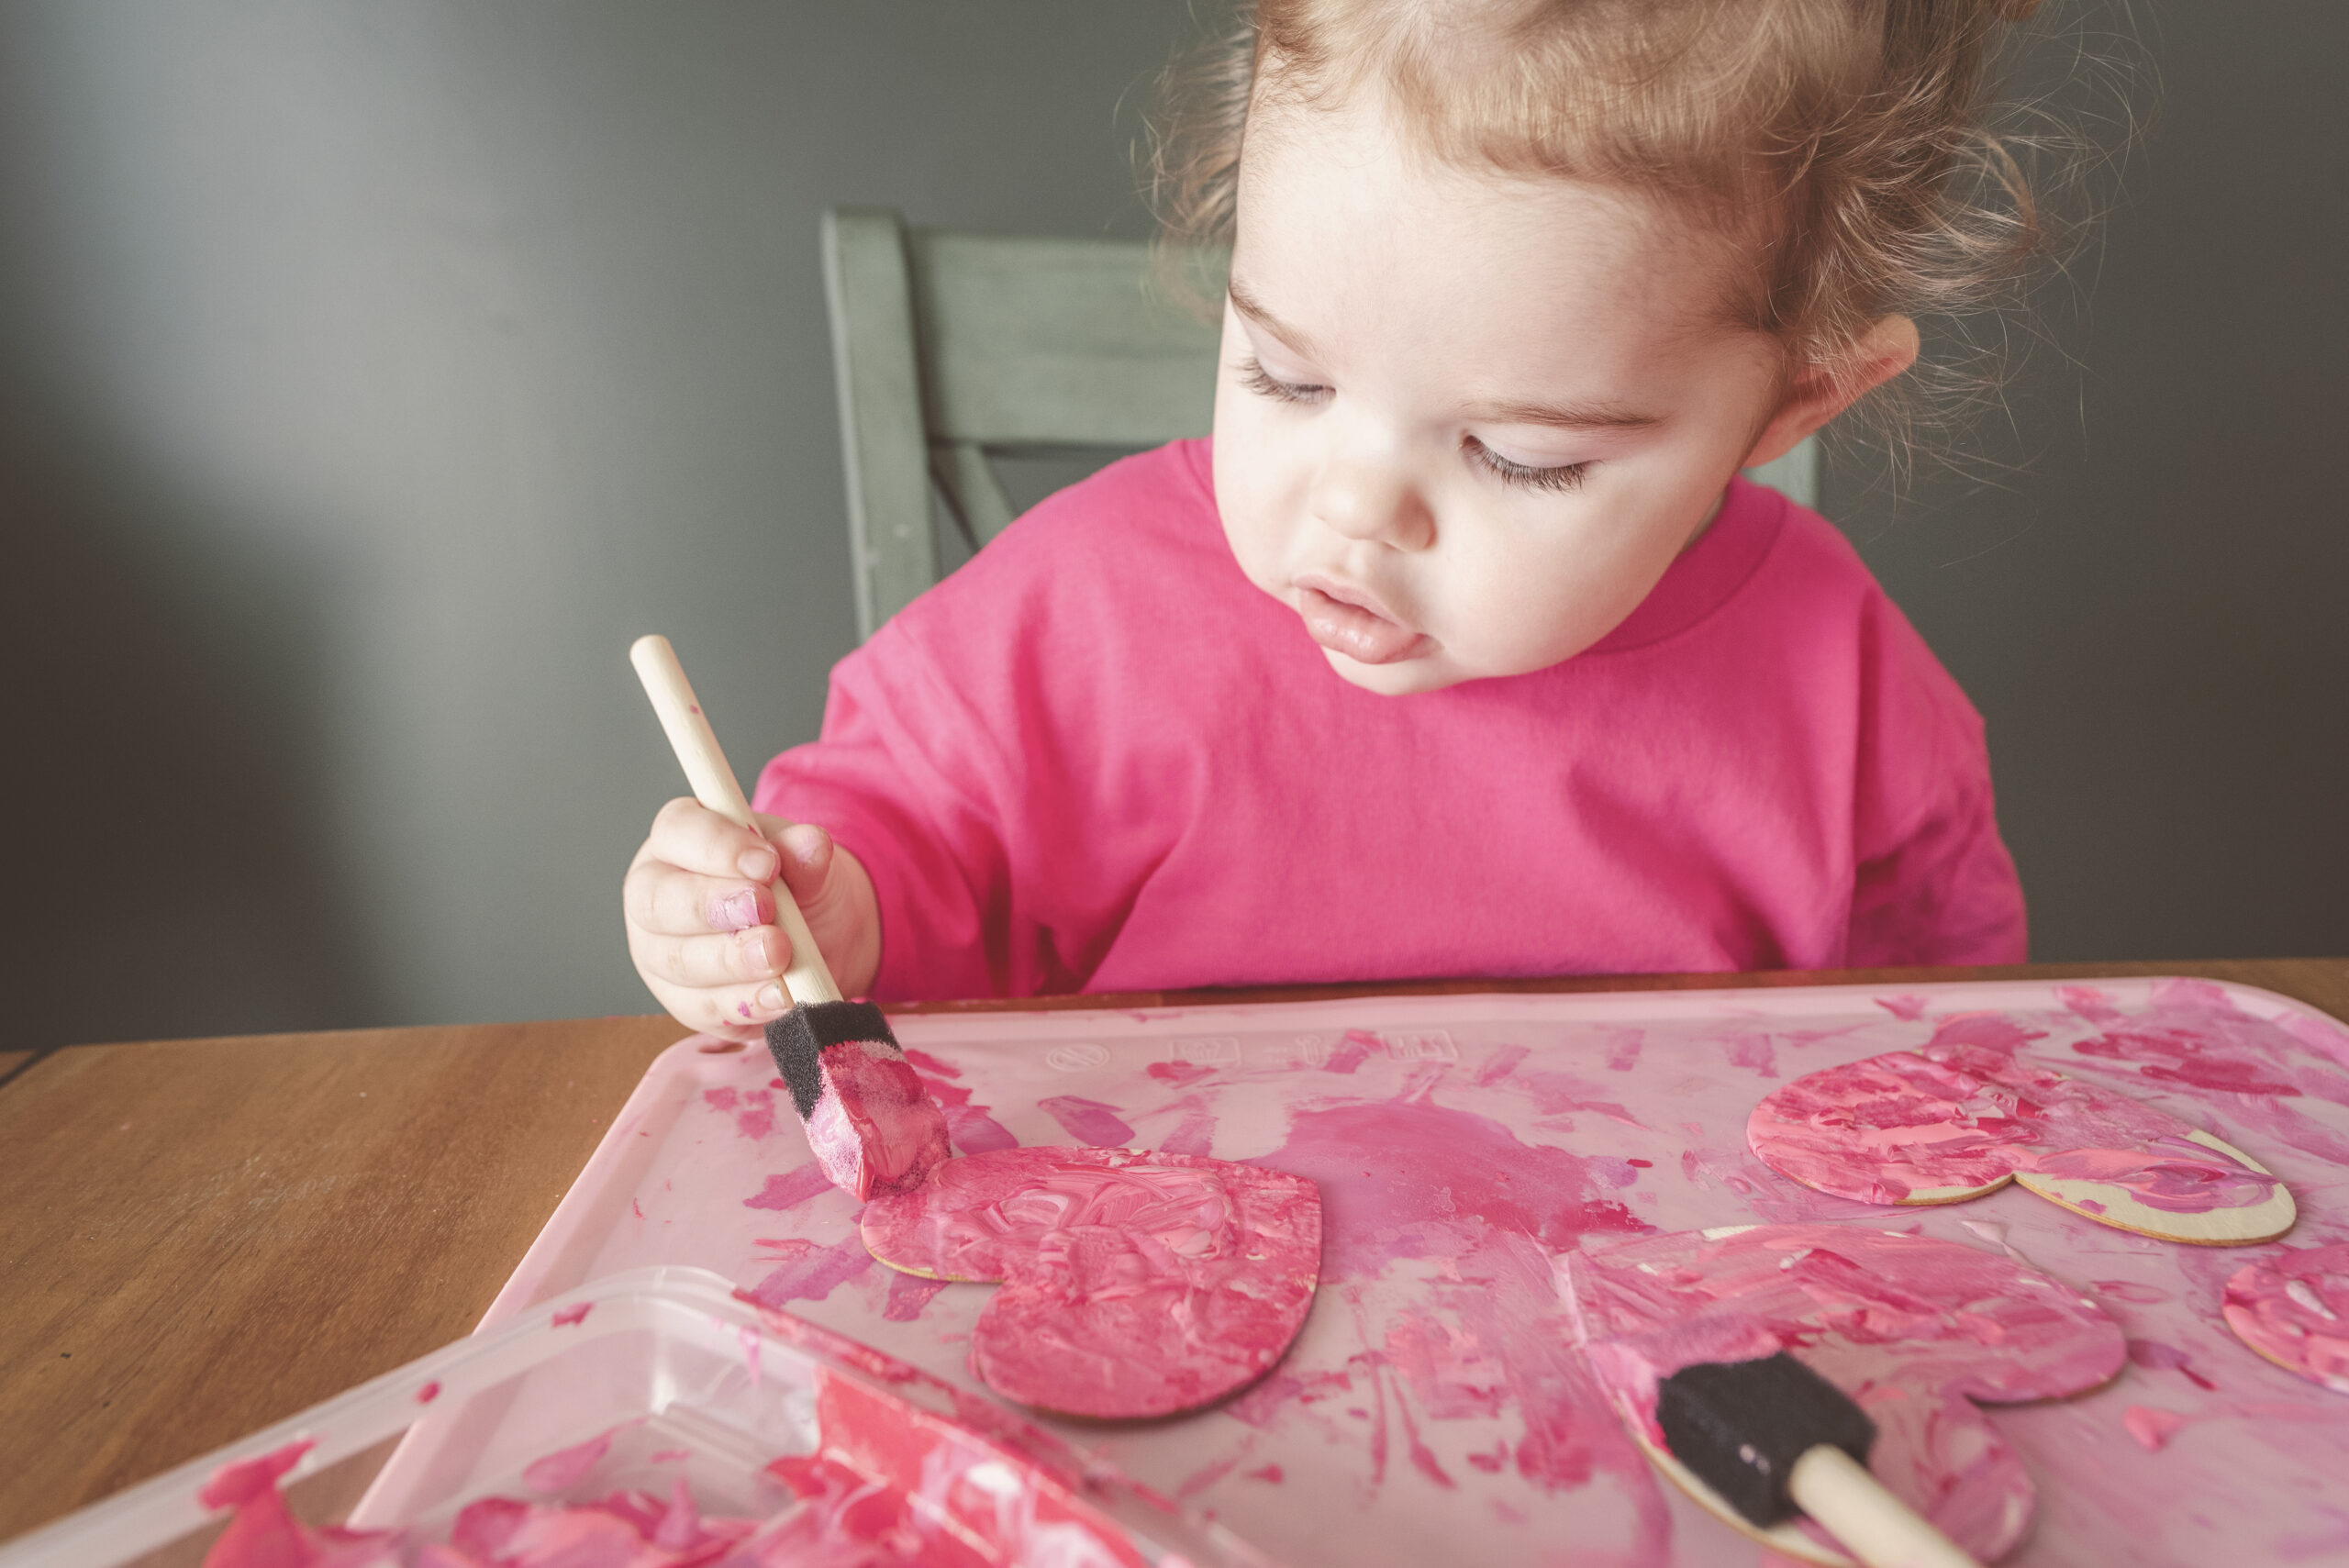
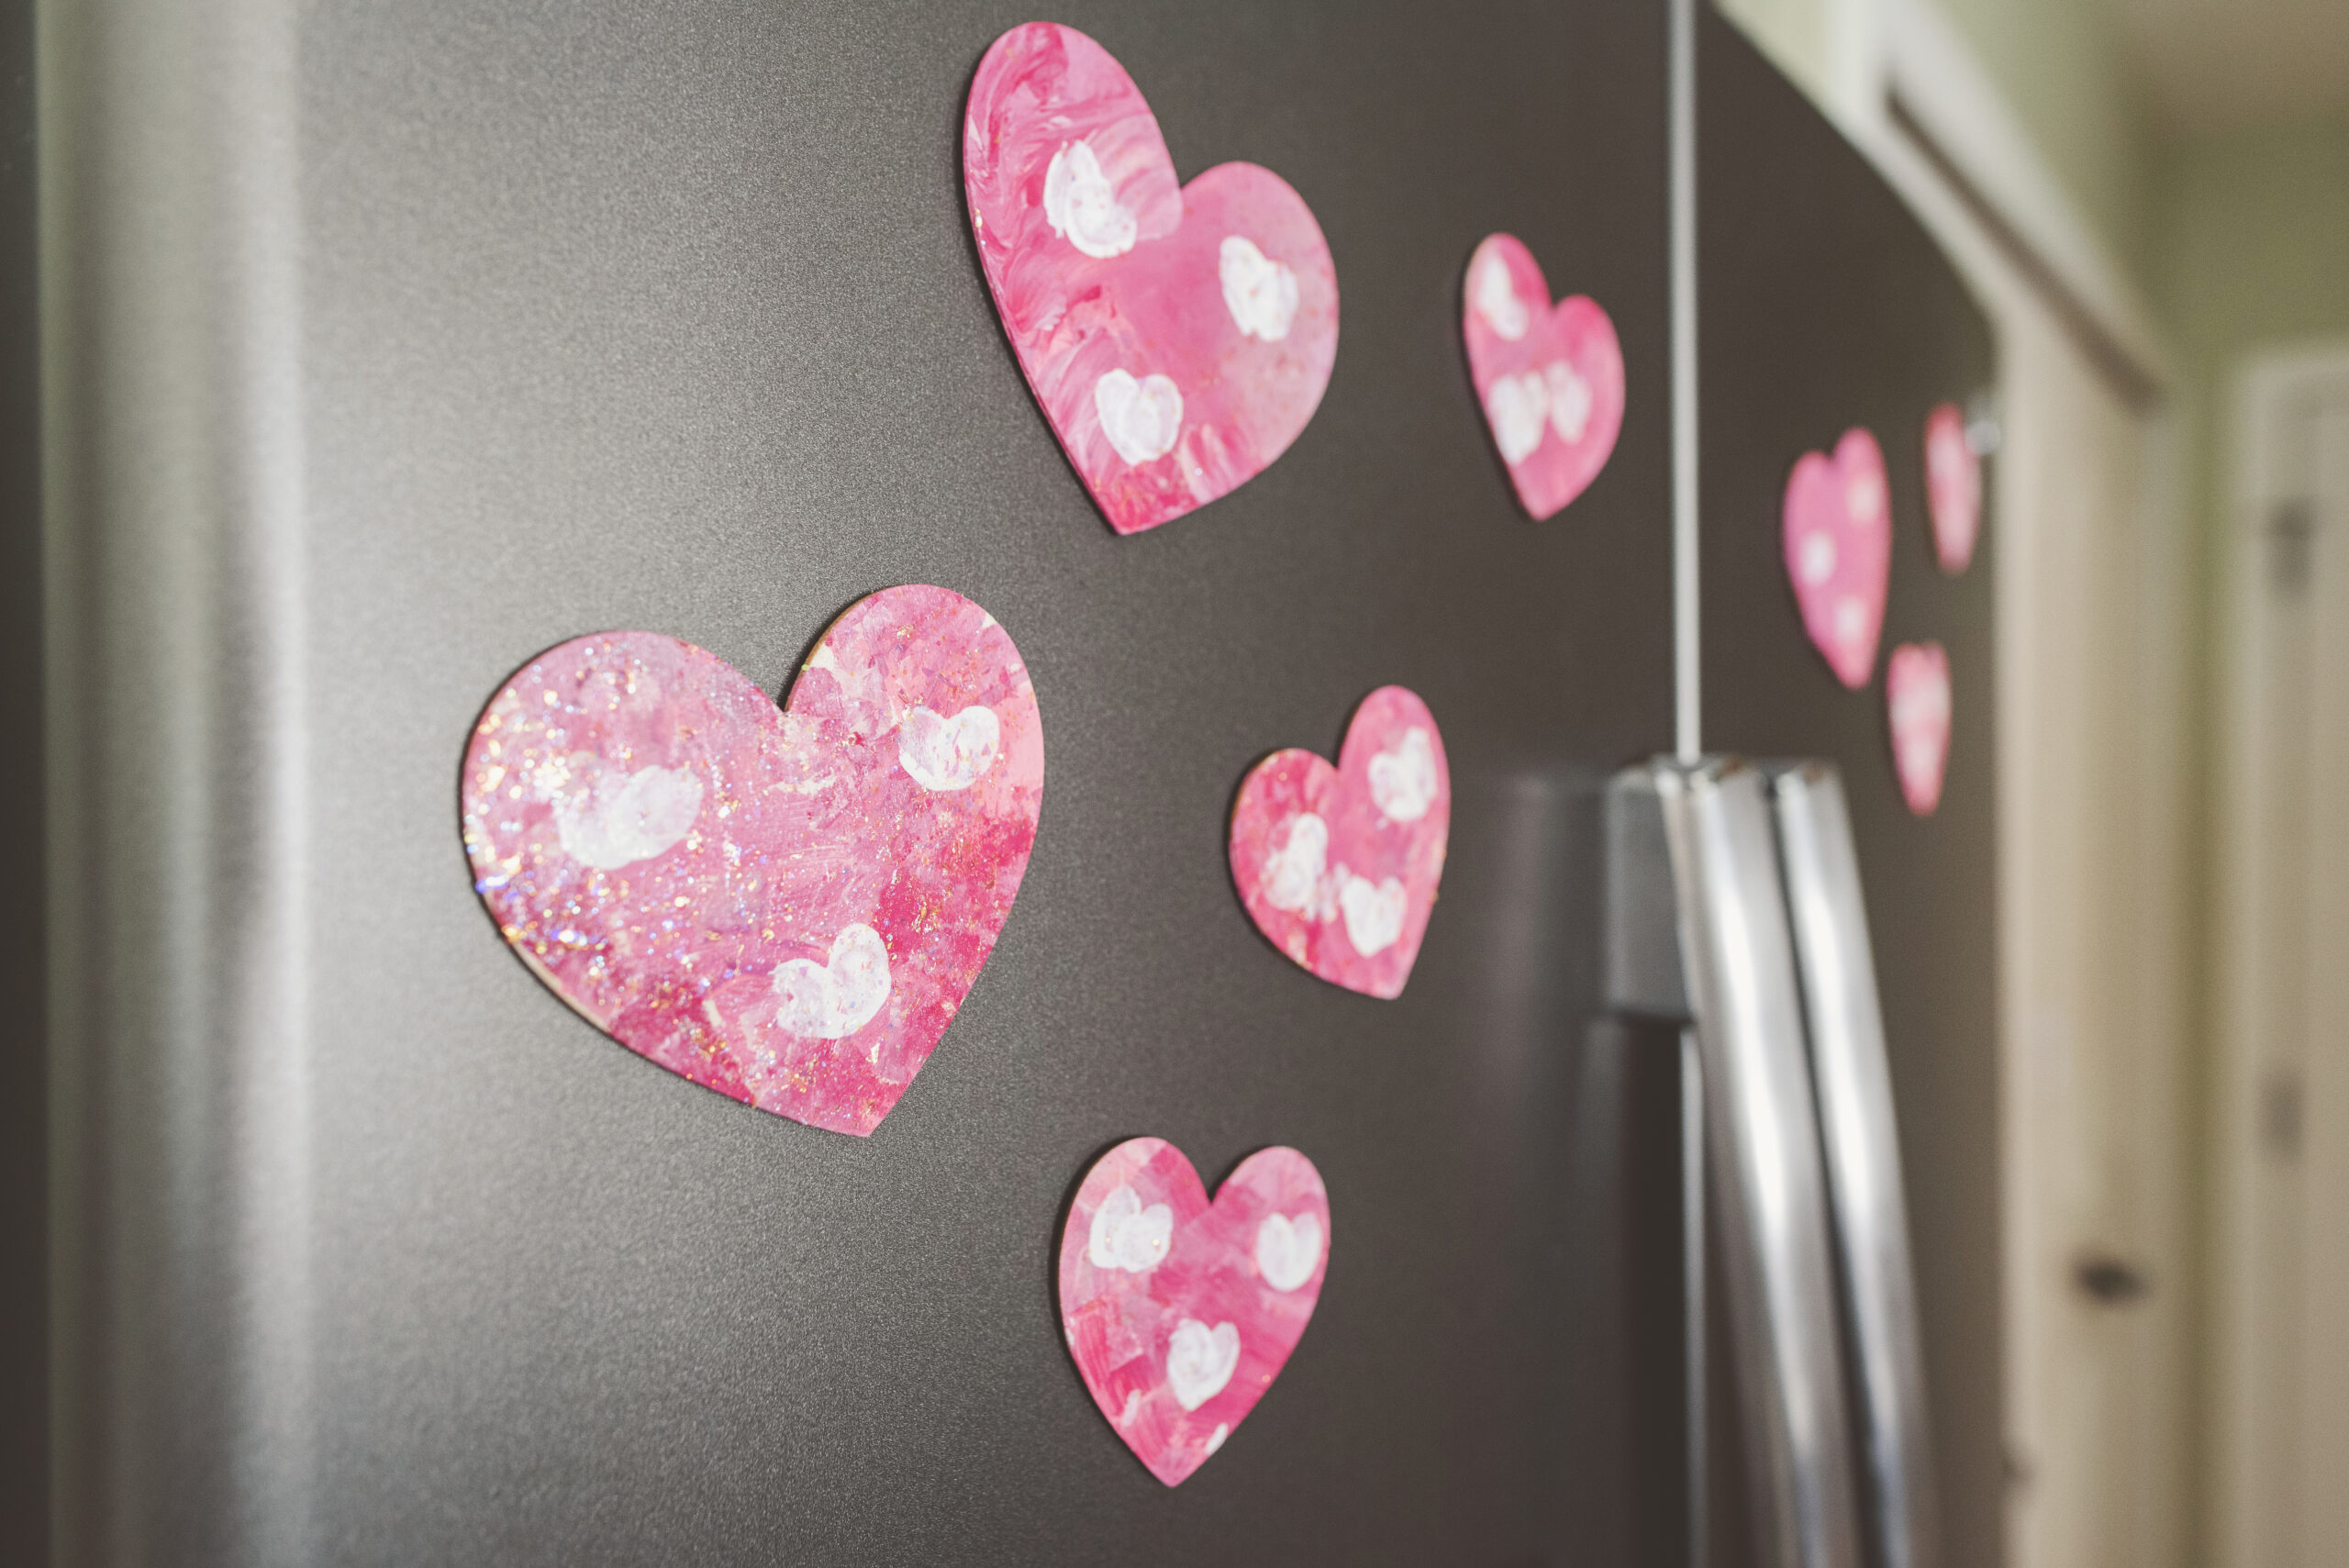
Once the main painting of the hearts are finished and they have all fully dried, you can either begin to add the glitter paint over top, or you can add some extra cute fingerprint hearts! 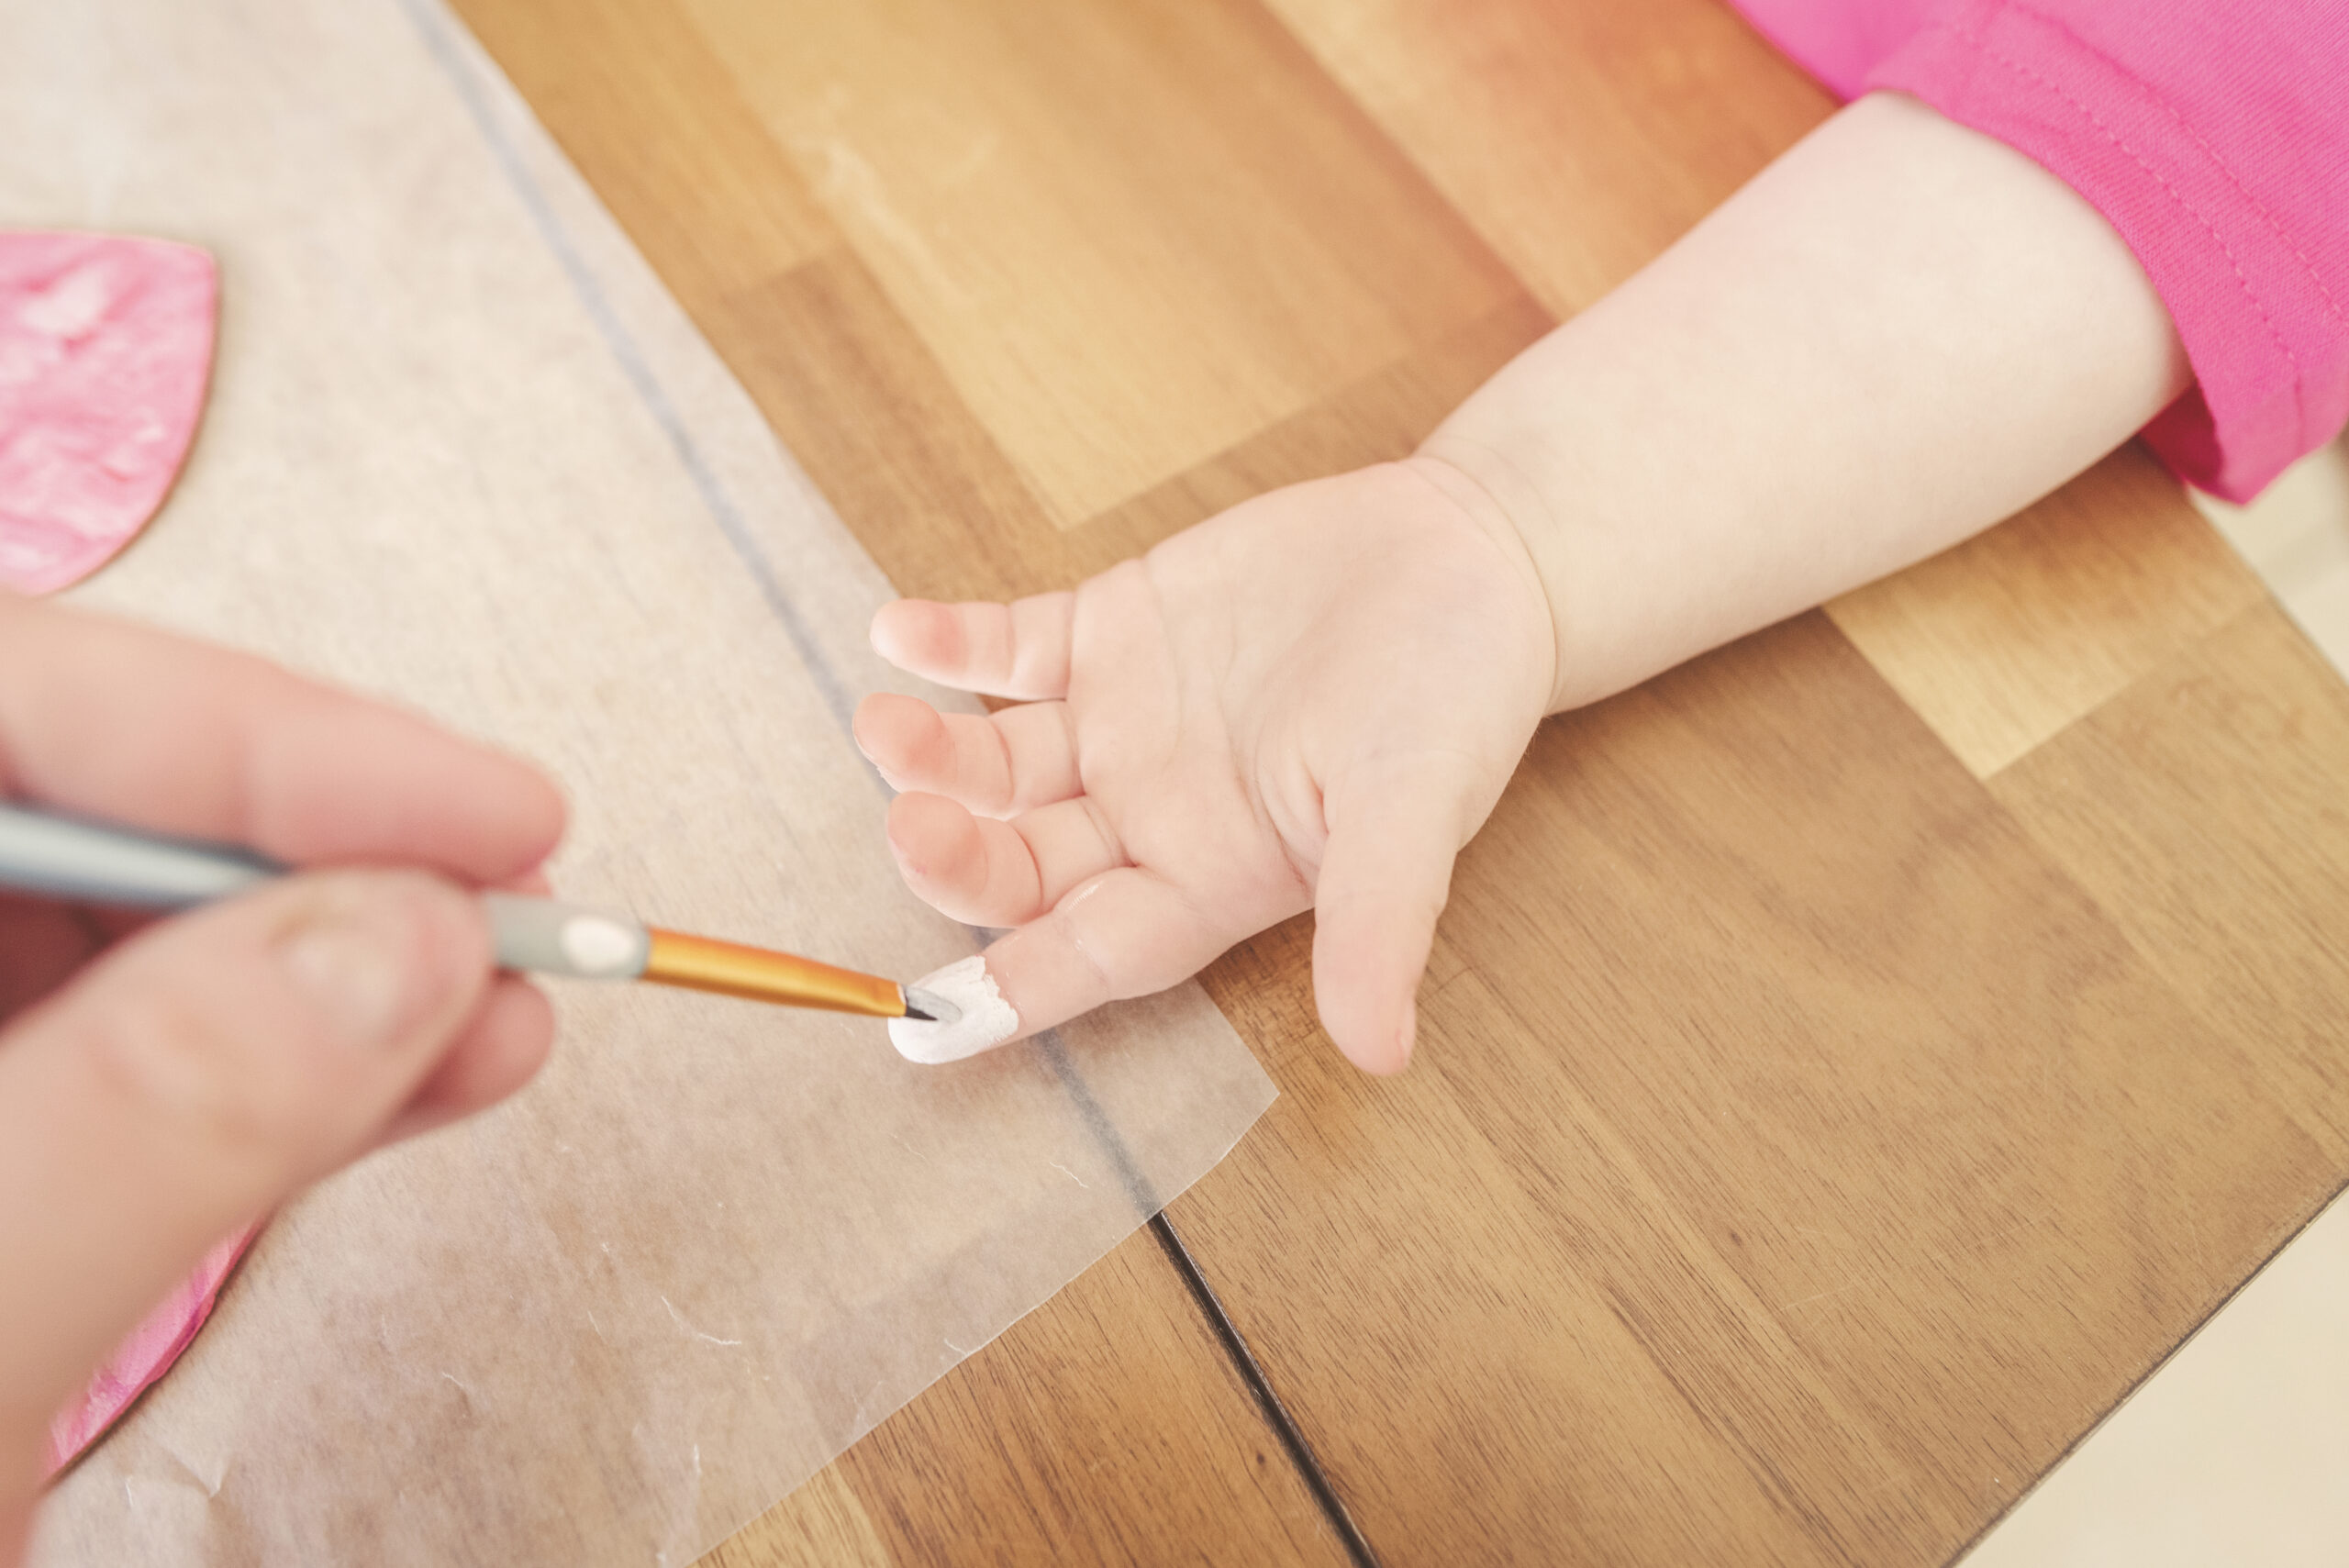
For the fingerprint hearts, I held Isabella’s little index finger out and painted it white. I then pressed it down twice crossed at the bottom to make a little chunky (sorta) heart shape. You can do this as many times as you’d like on the hearts, or use this as just a sort of signature of your child if you’d like and just do it once. I added it 3 times on each heart as just an extra little stamp of Isabella!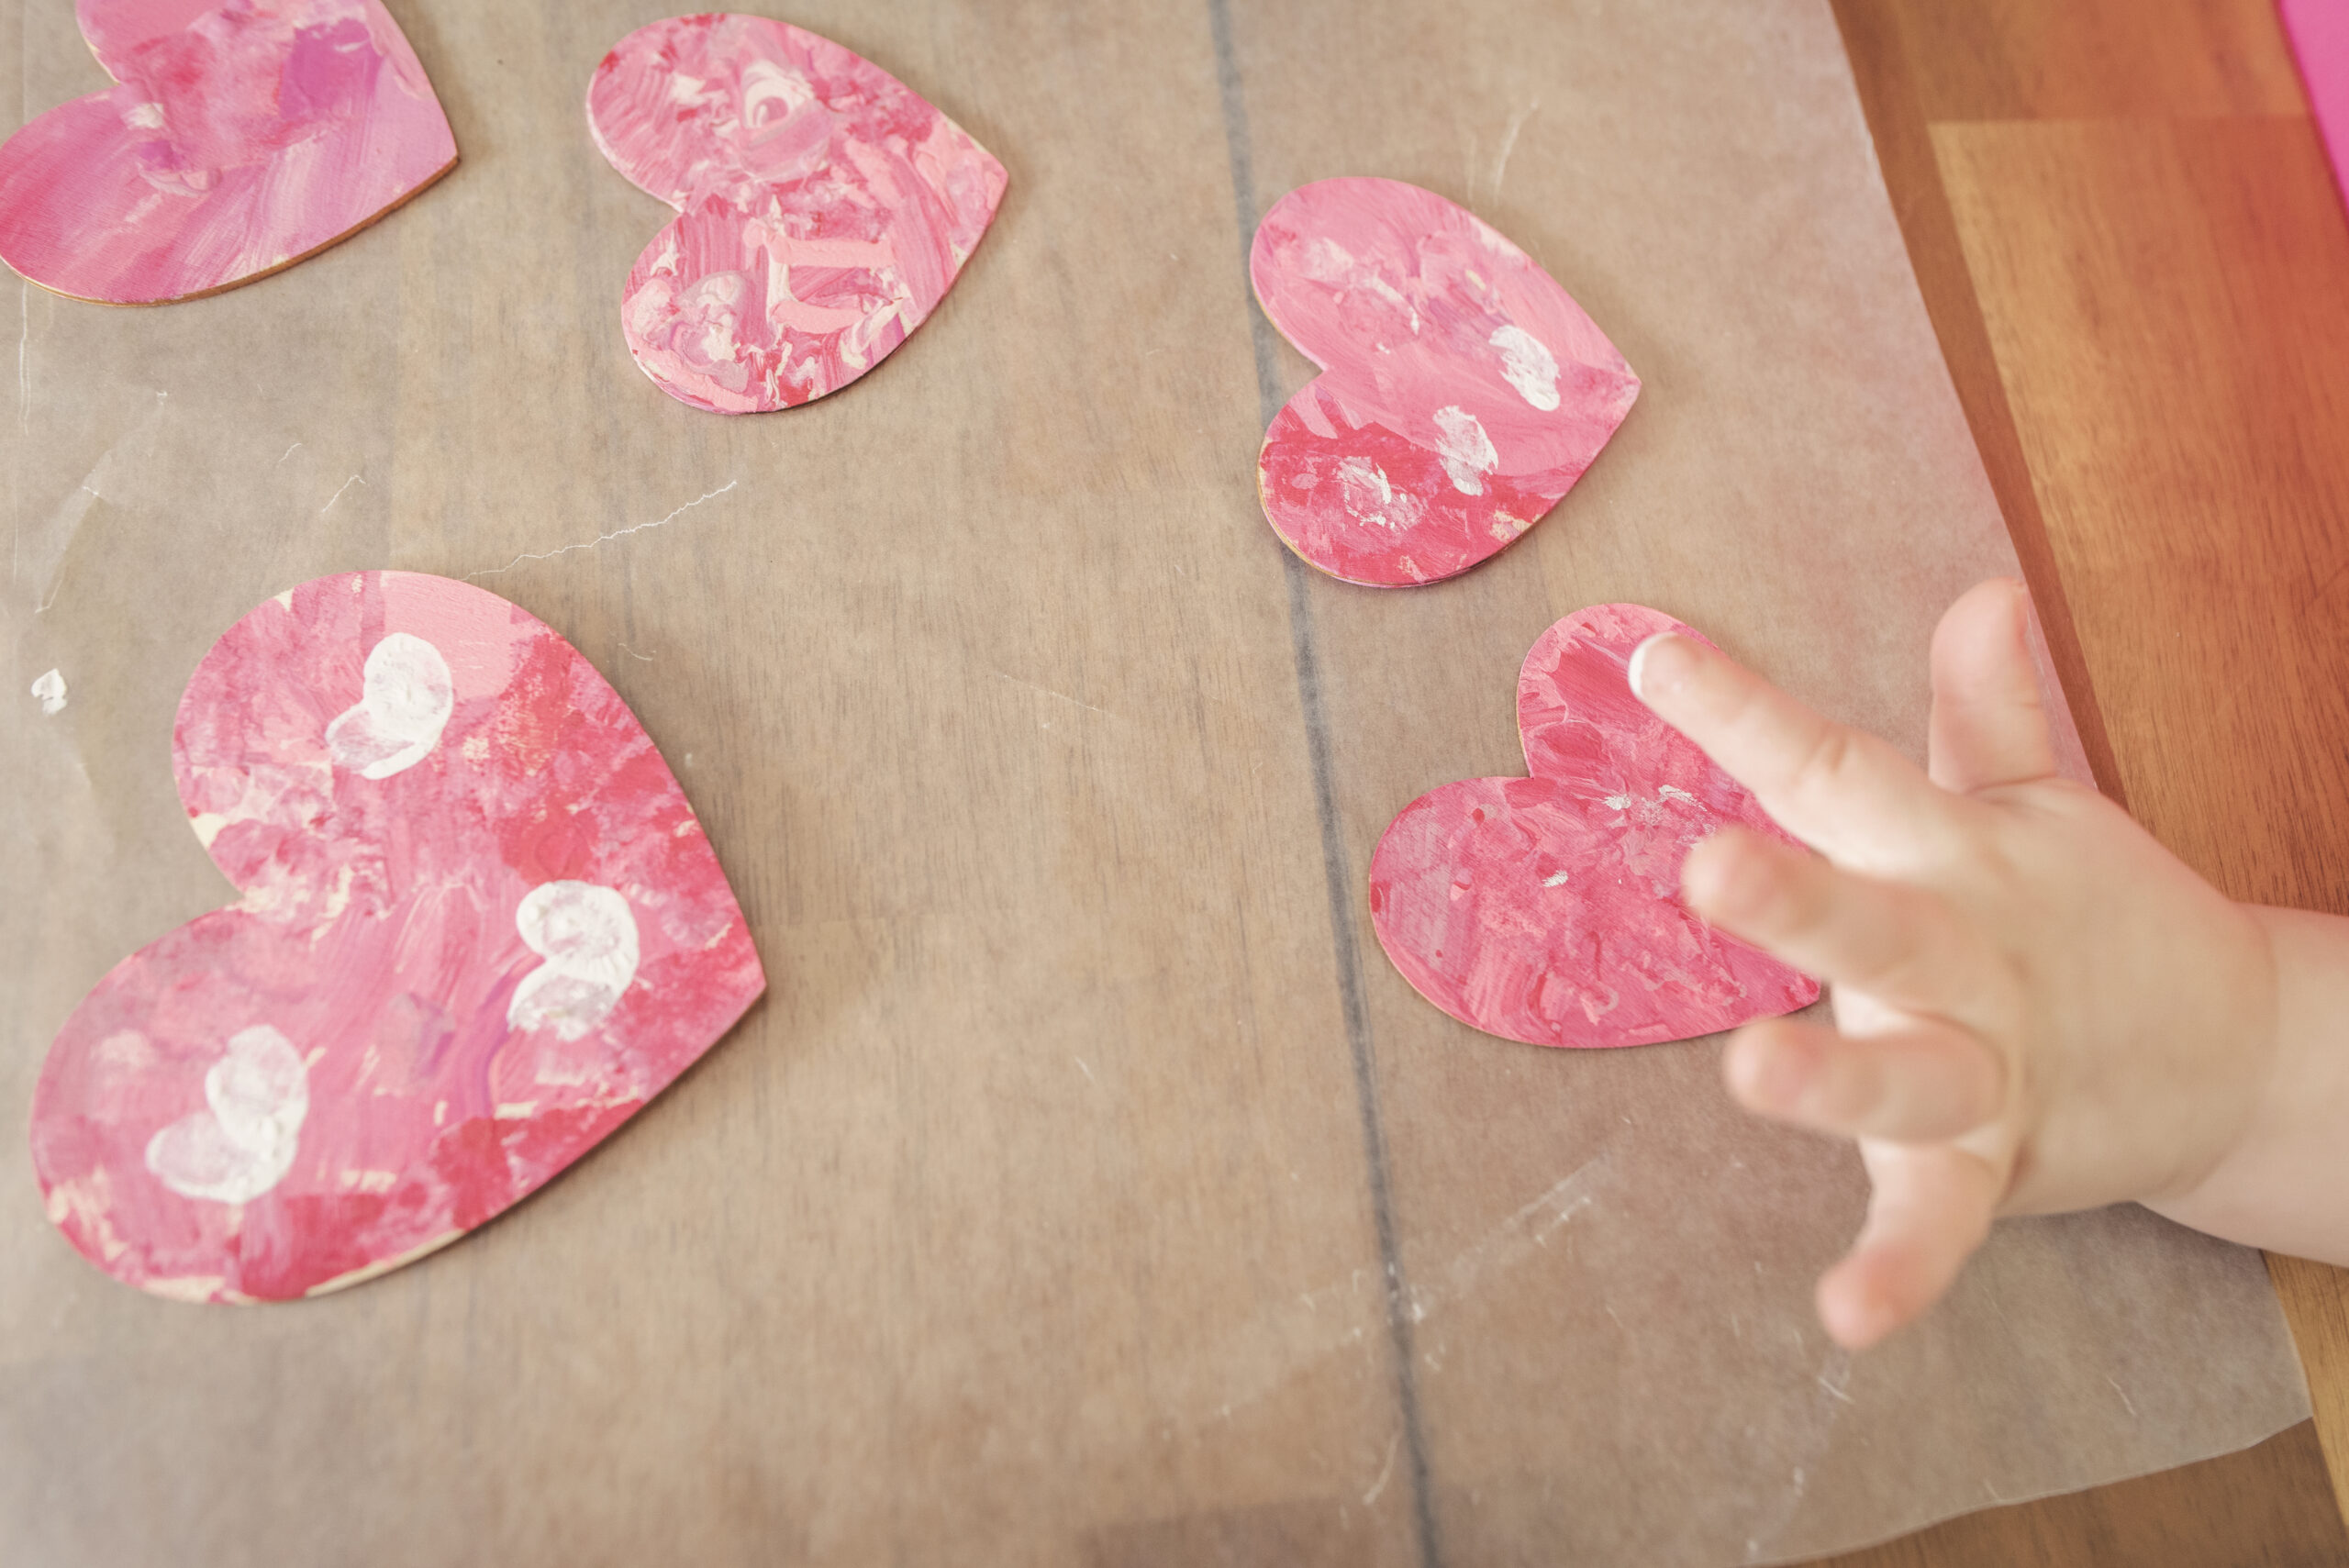
Once the fingerprint hearts are fully dried, it’s time to add the sparkle! Take a small brush and cover it with your glittery paint. The one we chose from the store was a mostly transparent, pinky toned one. This just adds a little something extra and acts as a somewhat clear coat seal on top. I have found doing this step myself to be much easier than letting Isabella. Since it is mostly transparent she doesn’t have the same interest as she does when seeing colors go on and mix together. After the glitter has been added, let these dry awhile longer.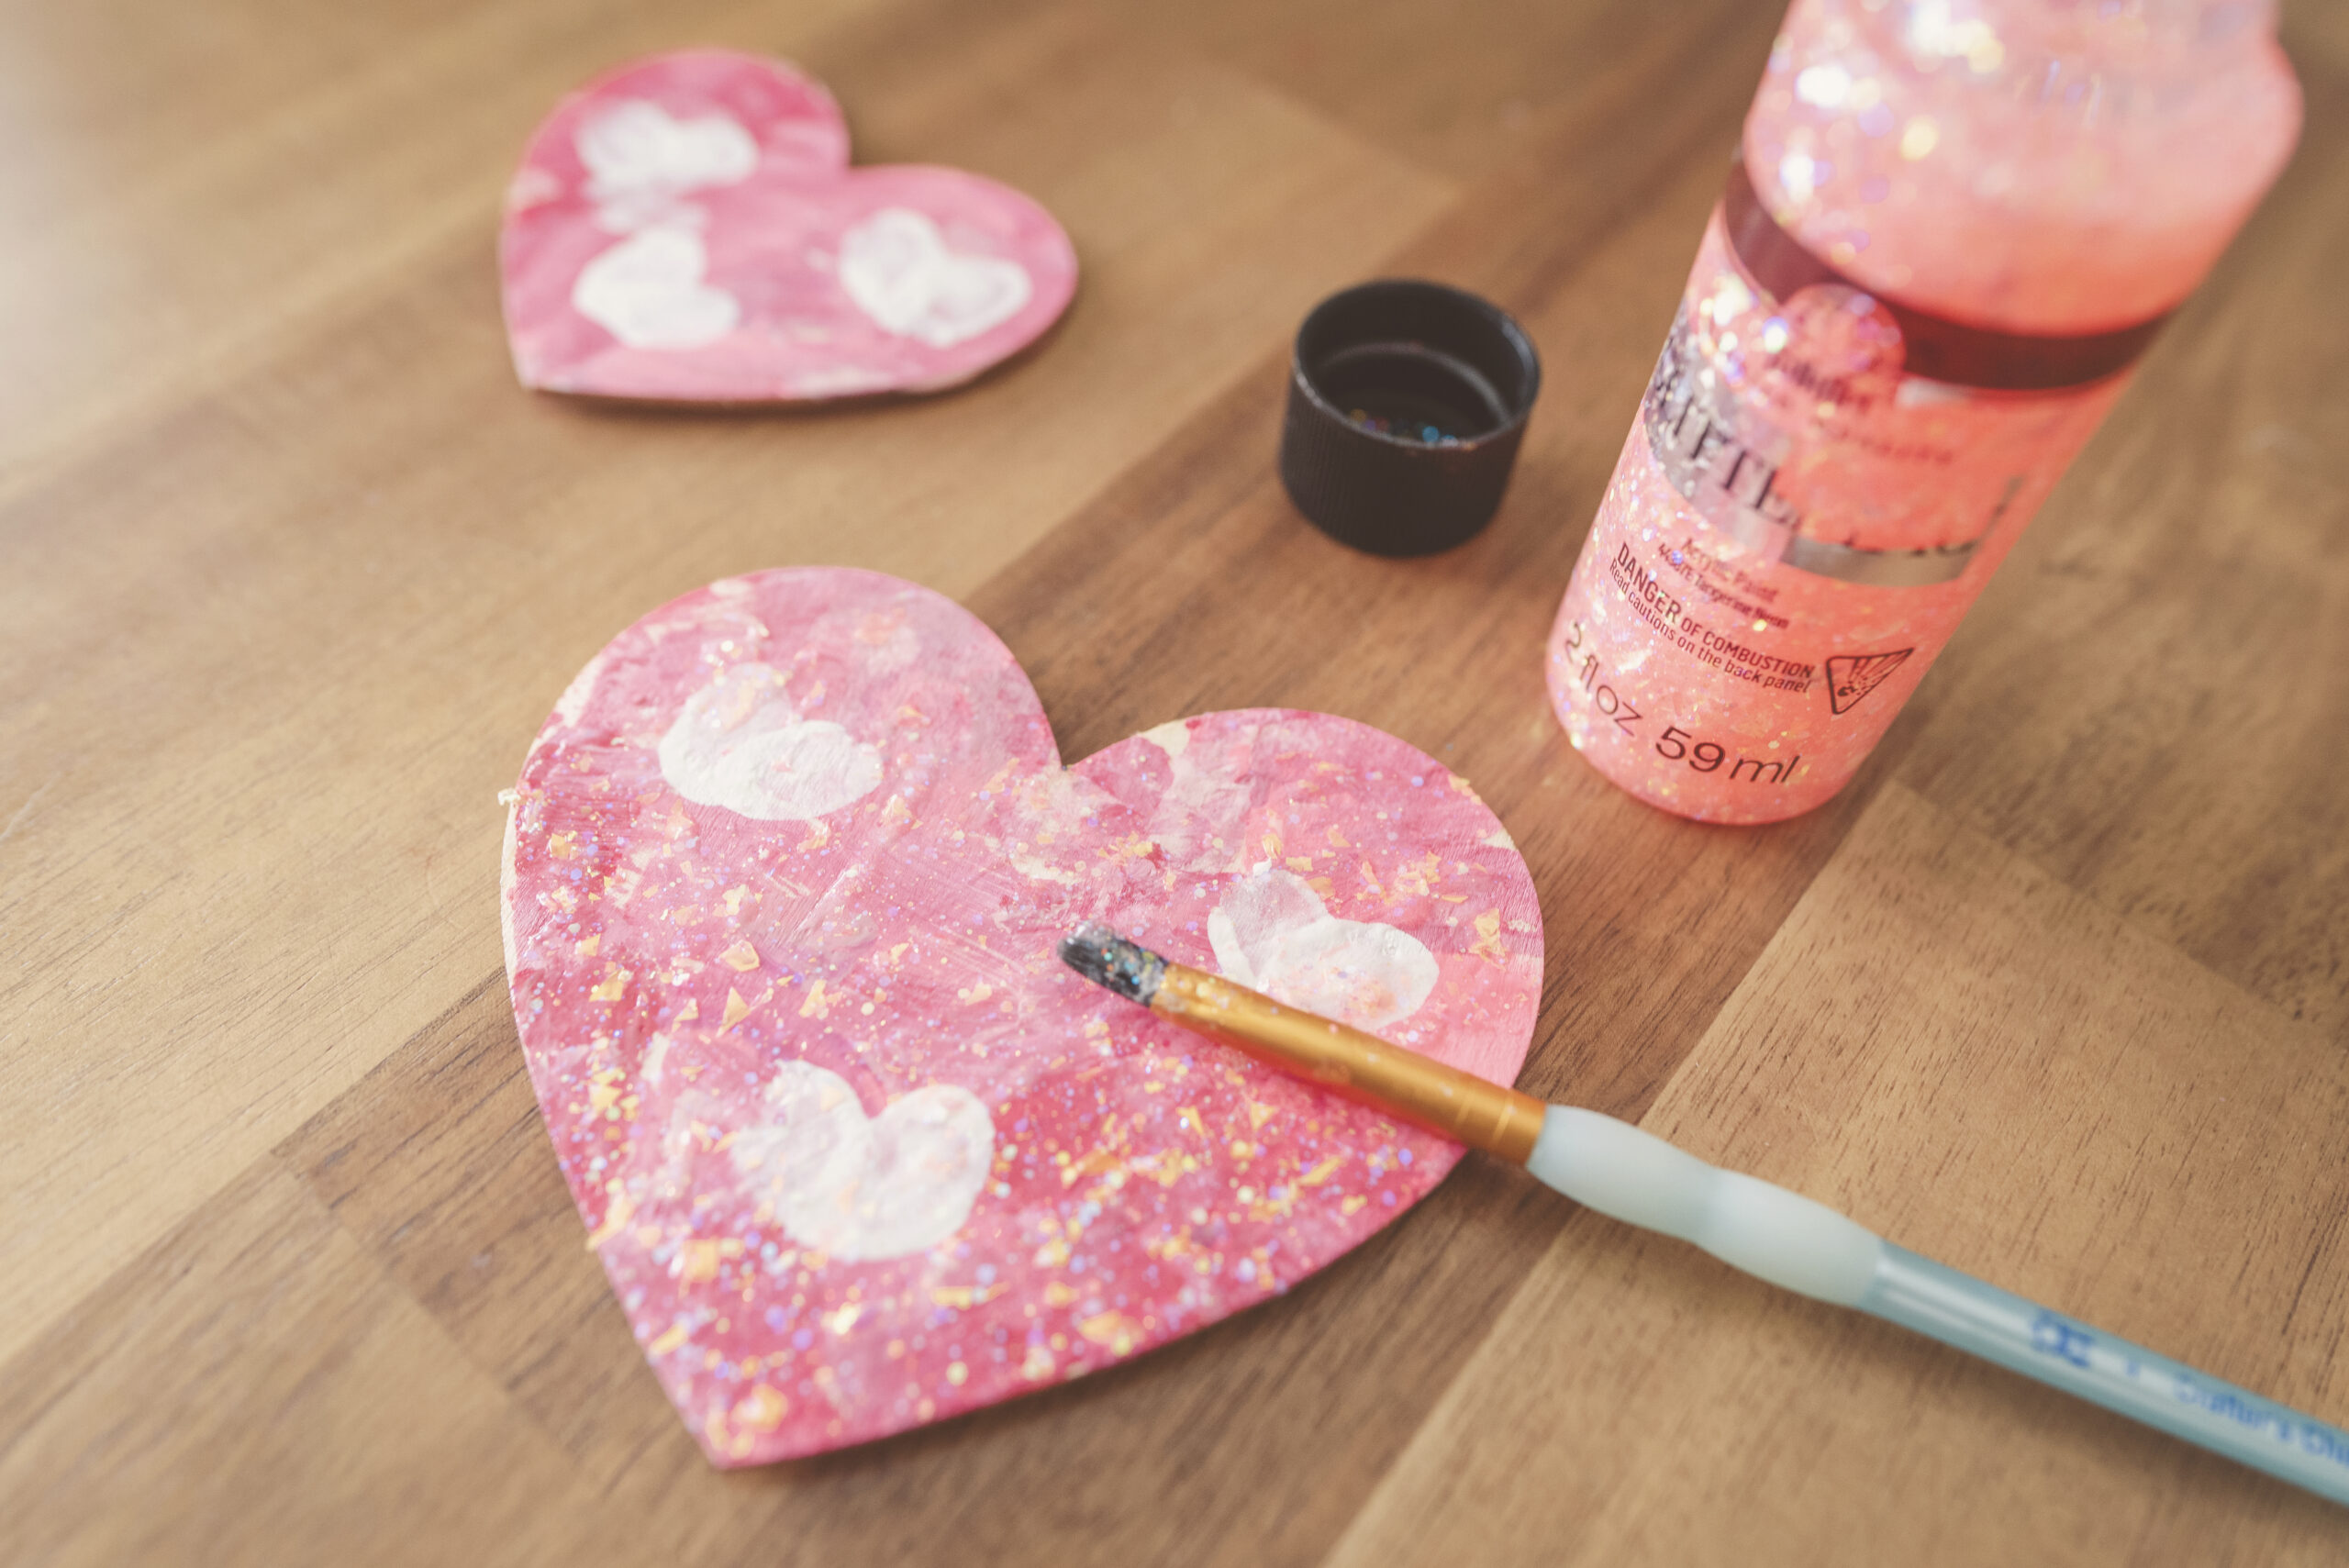
When your hearts are smooth and no longer sticky to the touch you can open your magnetic adhesive and grab your scissors. Flip over your hearts and eyeball the length you want your magnet to be on the backs. Cut to size and stick on in the desired place!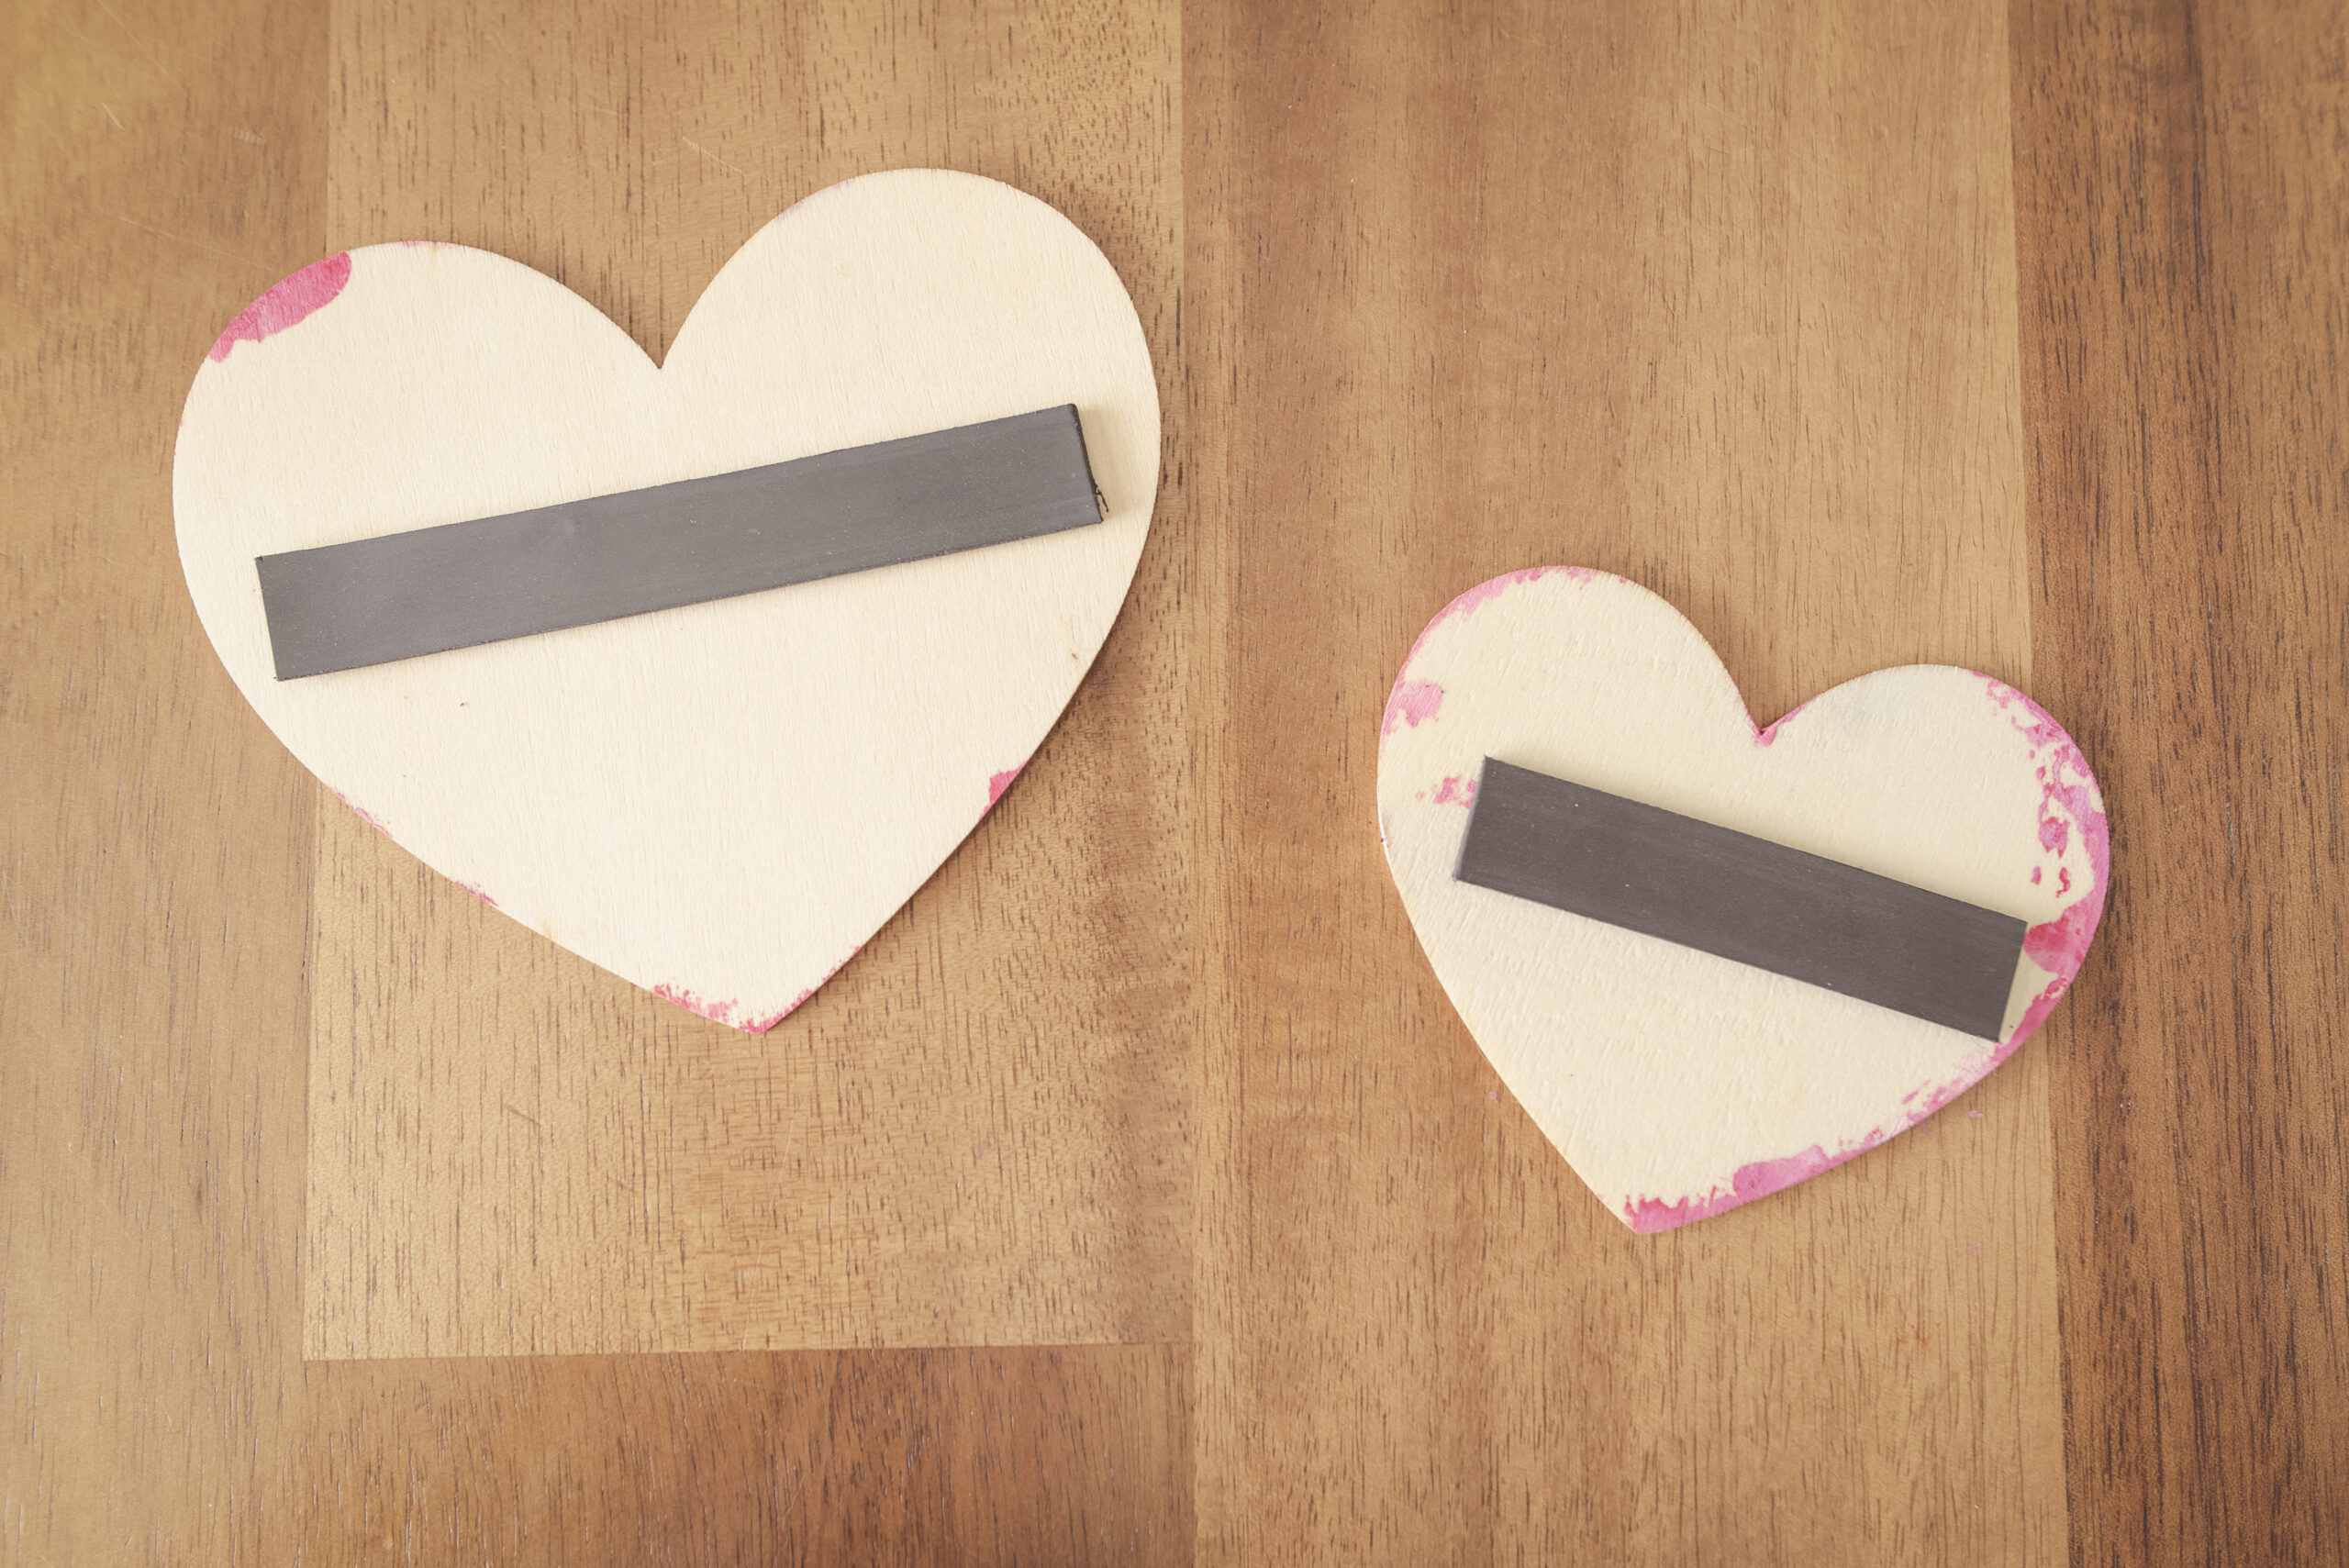
Now your Valentine’s Day magnets are complete, you can keep them for keepsakes or give them to your Valentines!